Connecting your GhostGraph to your Frontend

Smart contracts store and make visible their onchain state. How can we read this state?
We can, of course, use an RPC endpoint to call the contract's view methods directly, and for many use-cases this is sufficient.
But in some cases we need to read some kind of derived state that isn't explicitly stored onchain. For example, let's say we wanted to create a leaderboard UI for an onchain app and rank by user PnL. A global sorted leaderboard isn't typically stored onchain but we can derive it by creating an indexer (using GhostGraph for example).
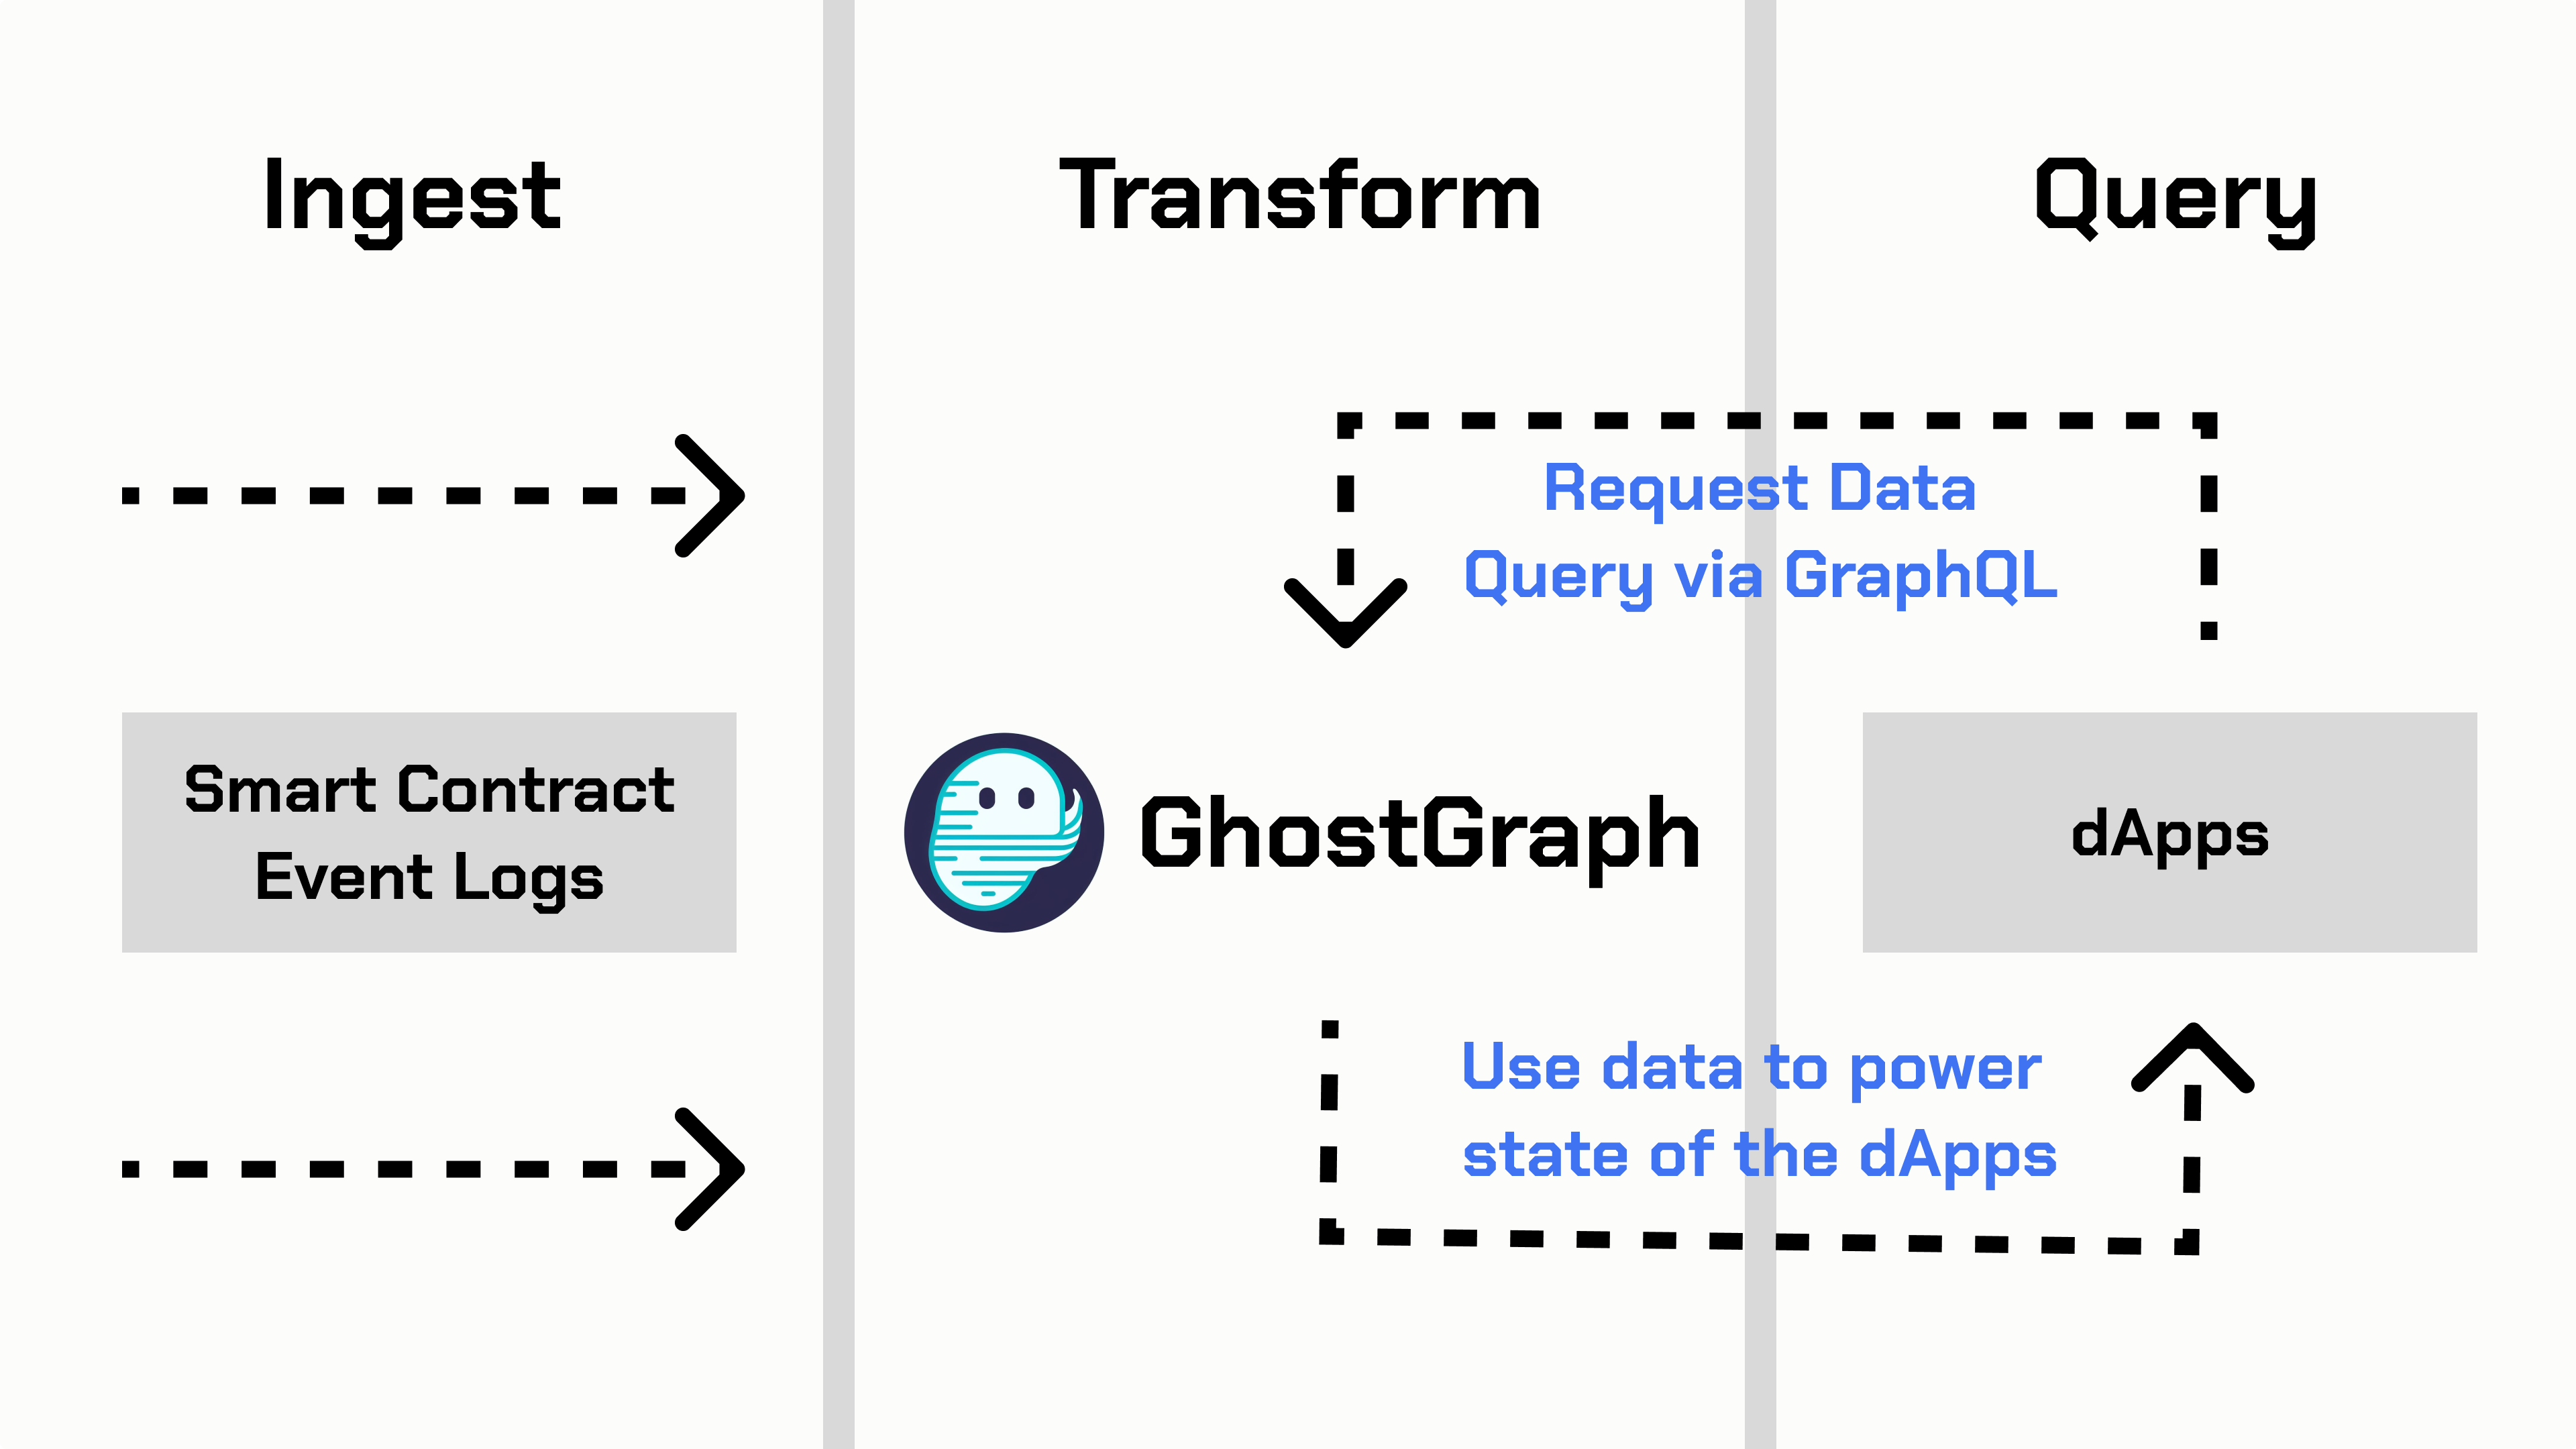
At a high level, the indexer ingests event data from smart contracts, transforms it, and stores it into a database that you can query. GhostGraph makes this super easy.
In this tutorial, we'll leverage GhostGraph to build an indexer that automatically ingests and transforms contract events and then we'll hook it up to a frontend UI.
Project Context
For this tutorial we'll reference SuperBlurBattlerz which is an onchain app that runs on Blast L2.
Pre-requisites
If you haven't already, sign up for a new GhostGraph account here.
Need Help?
If you are stuck at any time, feel free to join our Telegram for help.
Visual learner?
Check out our YouTube video that walks you through the steps in less than 3 minutes!
All Set? Let's Go!
Log in to GhostGraph. Once logged in, navigate to the Library tab. Here, you'll see existing community graphs that you can fork into your workspace as templates.
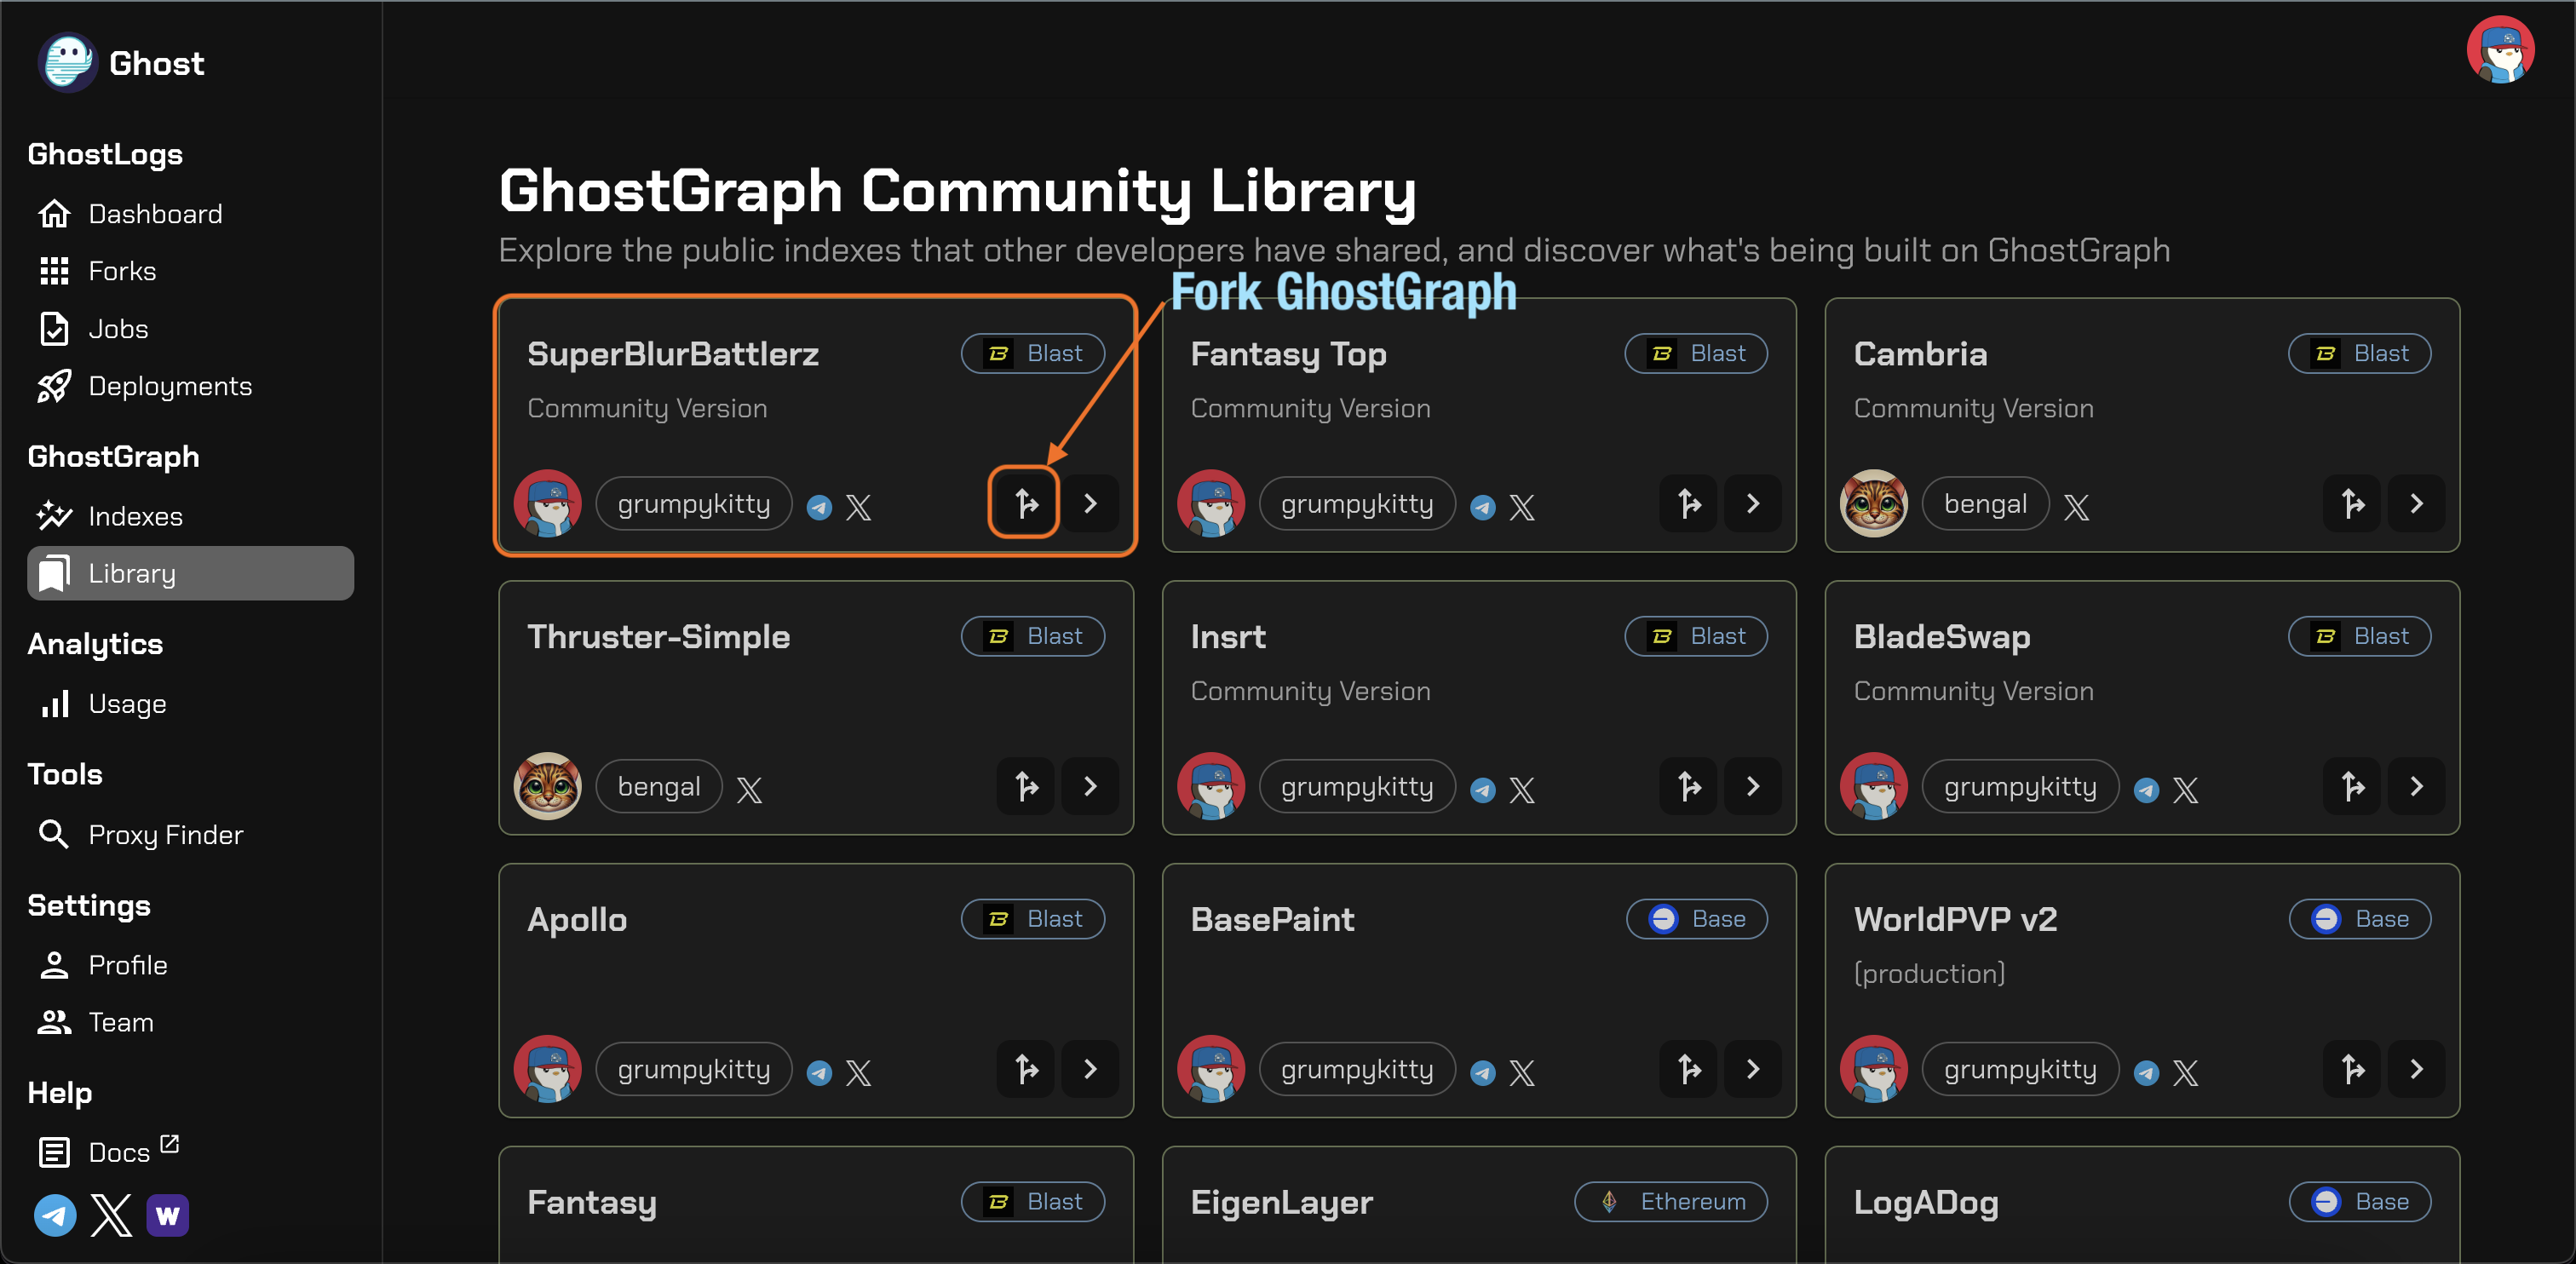
Click on the fork button to create a copy of this GhostGraph in your own workspace.
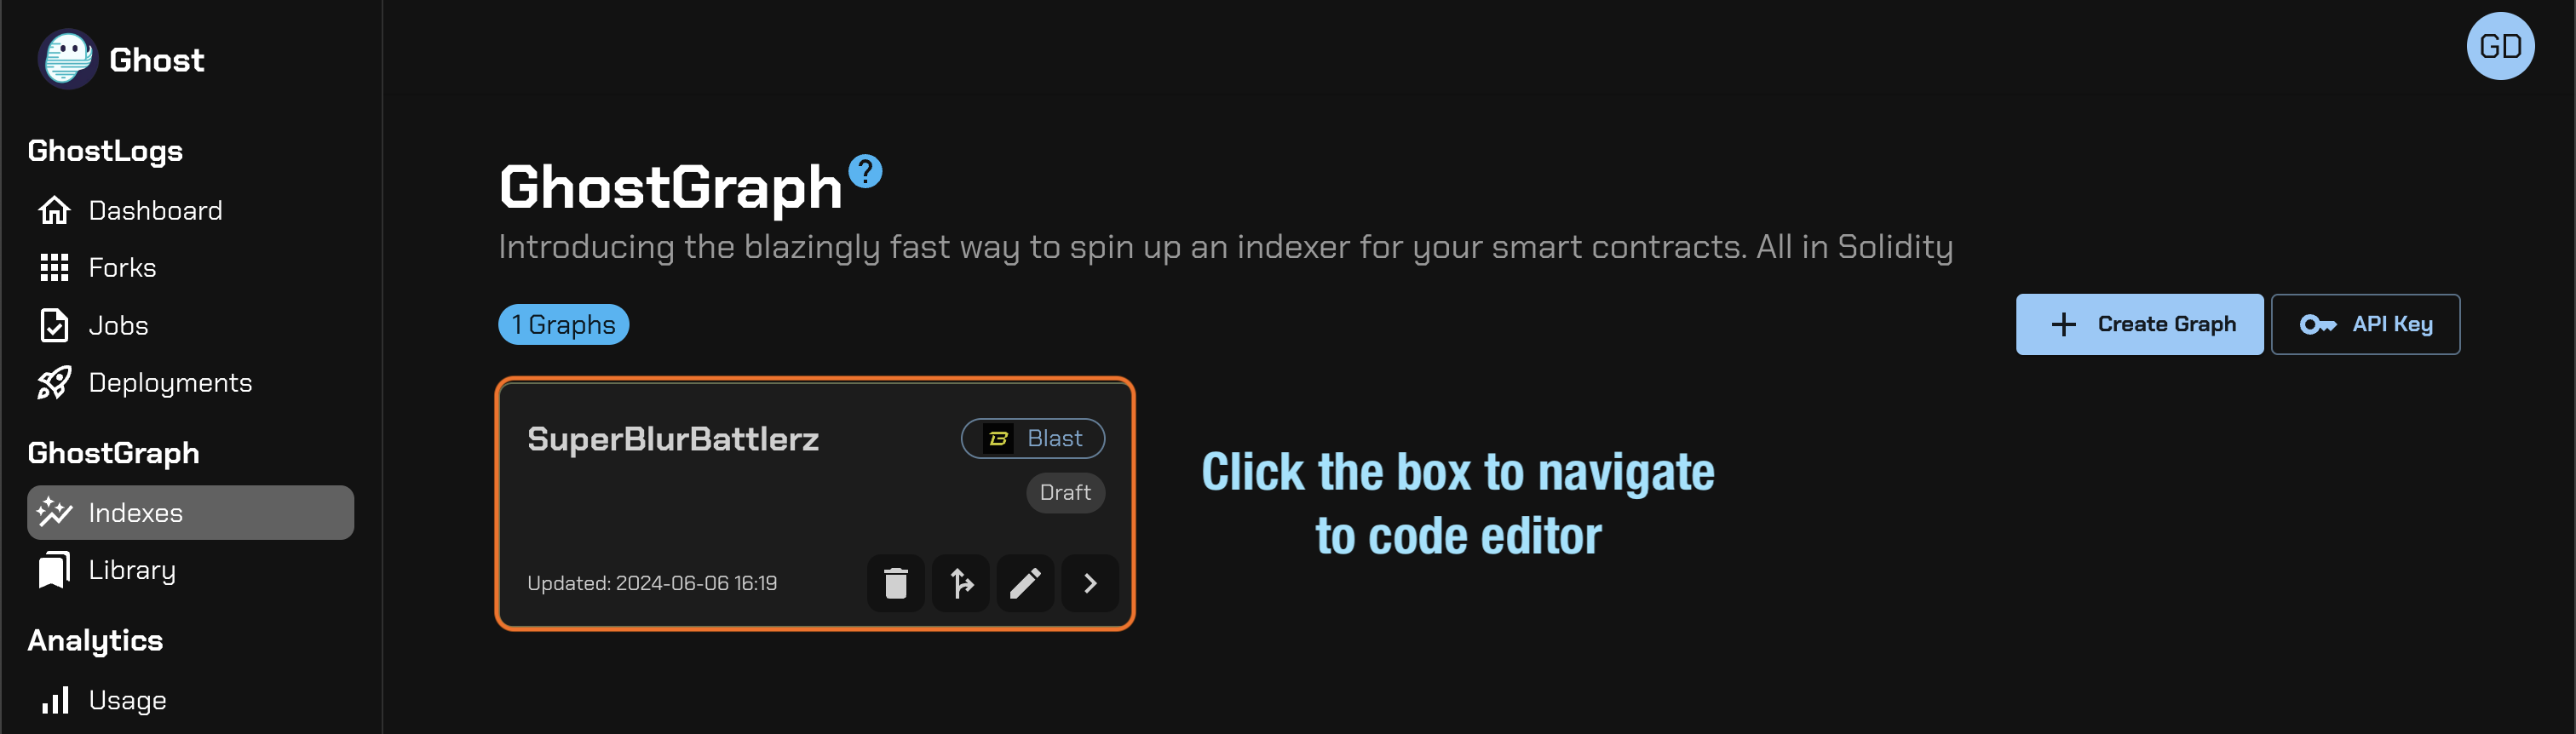
Go to the Indexes tab and click on the box to navigate to the code editor.
Code Editor
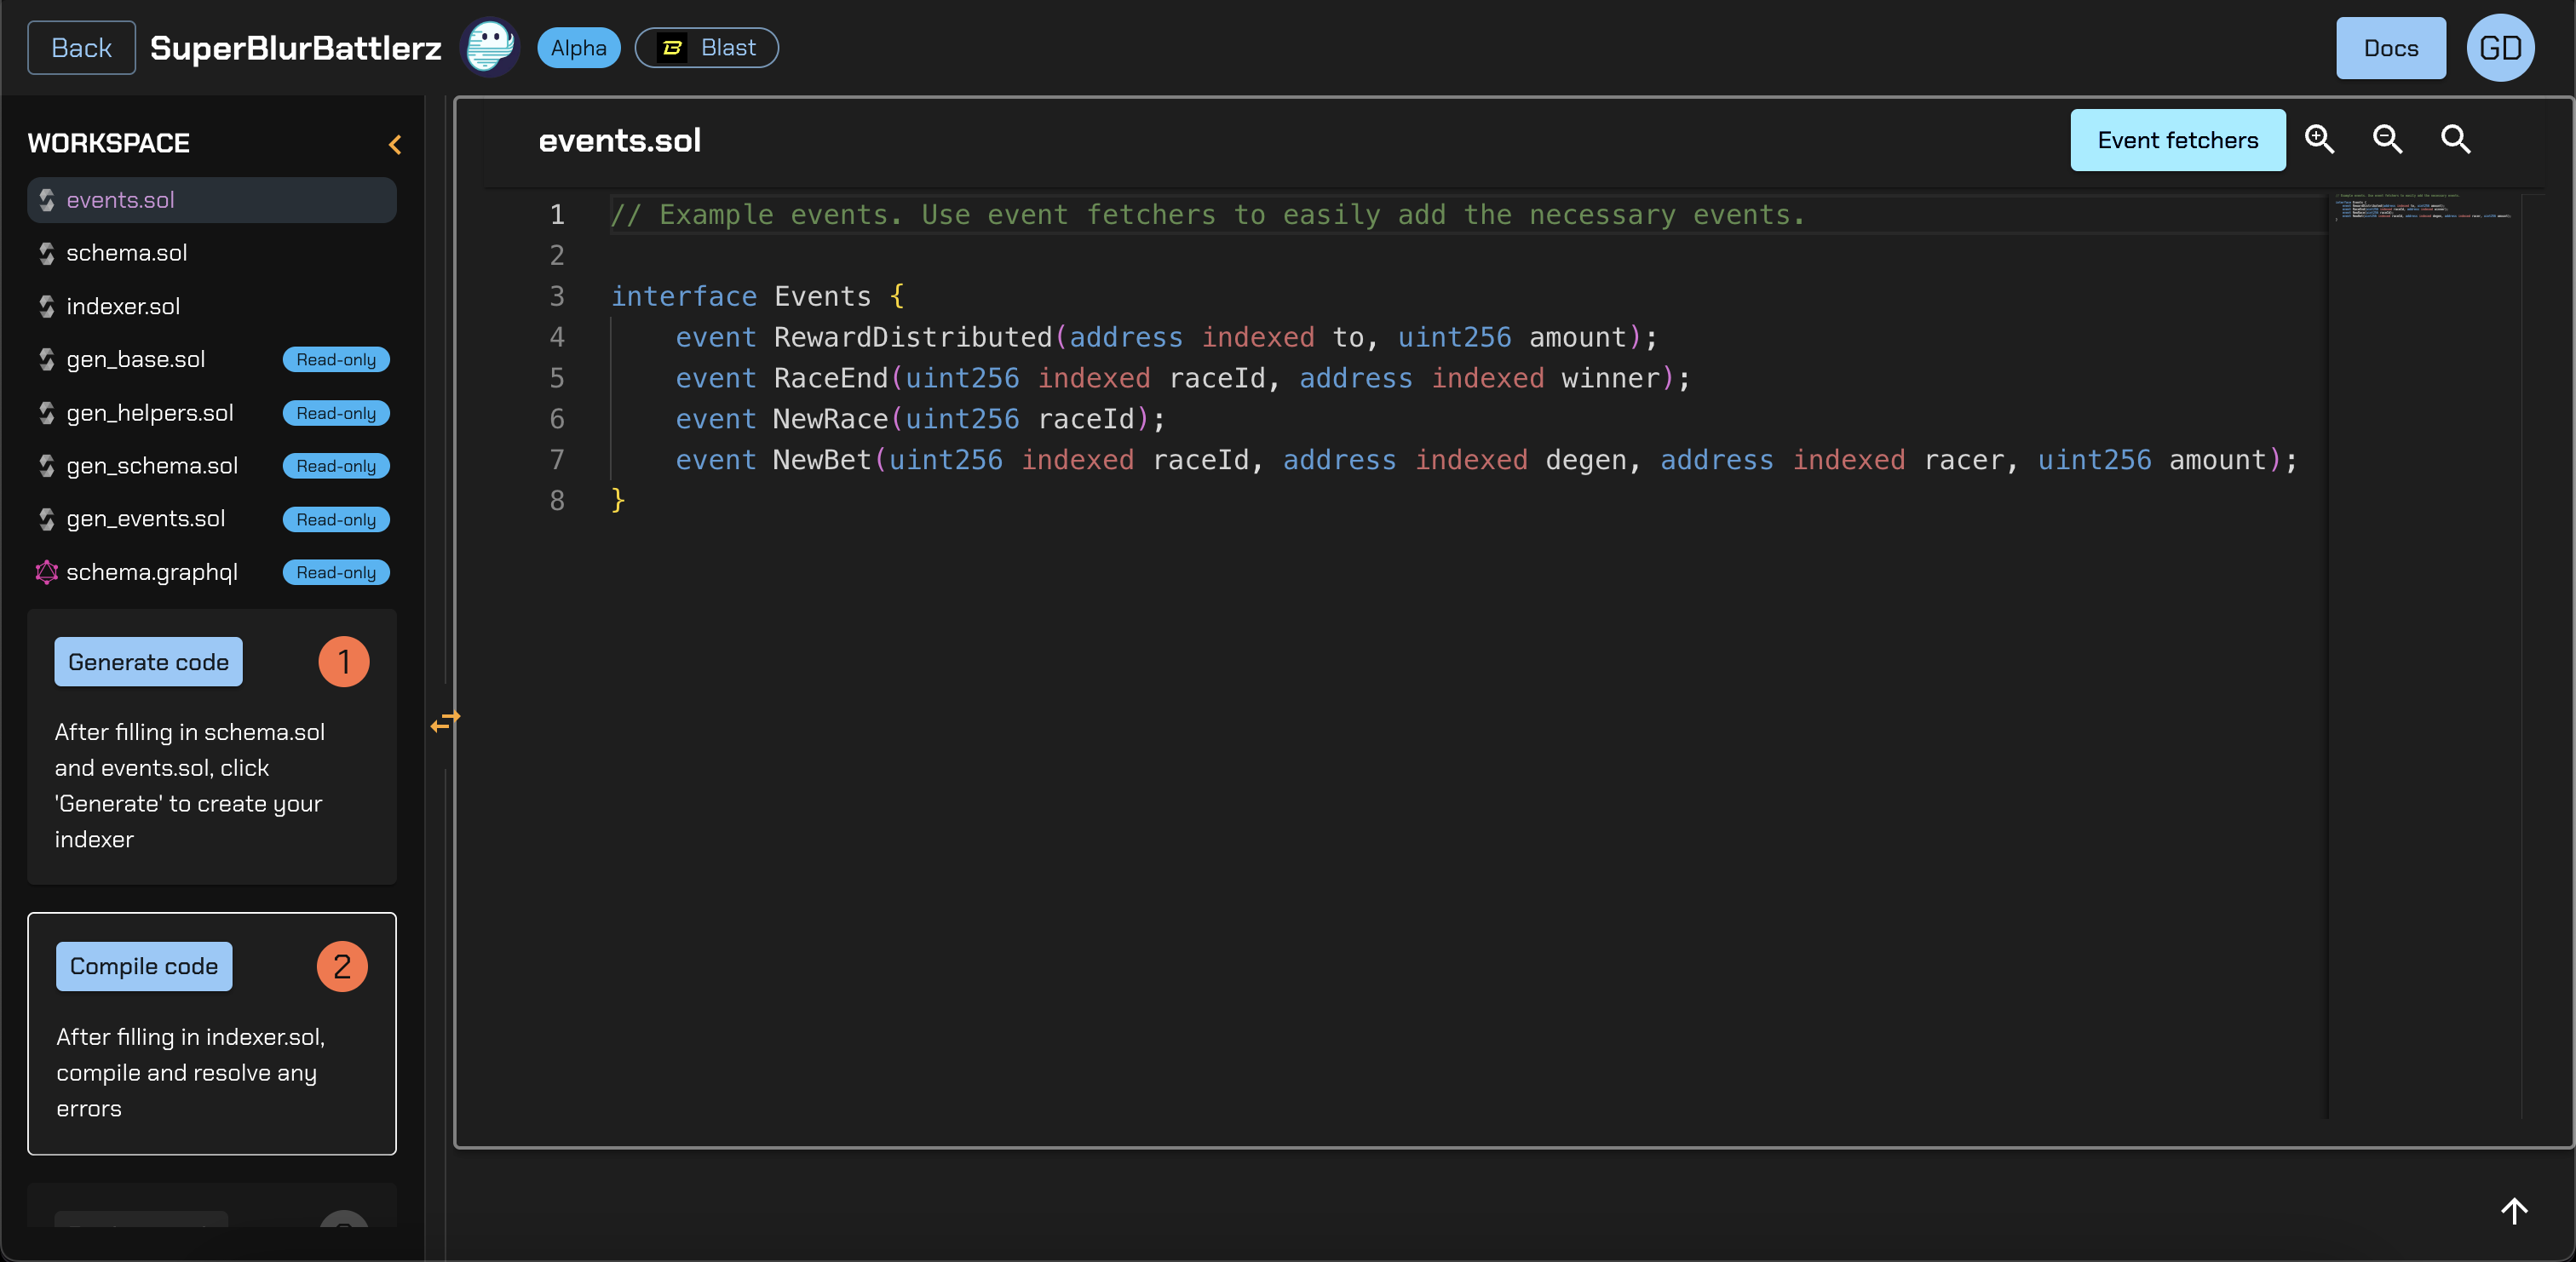
Events.sol
Smart contracts emit events for users to consume. Here, we define the events we want to track.
Schema.sol
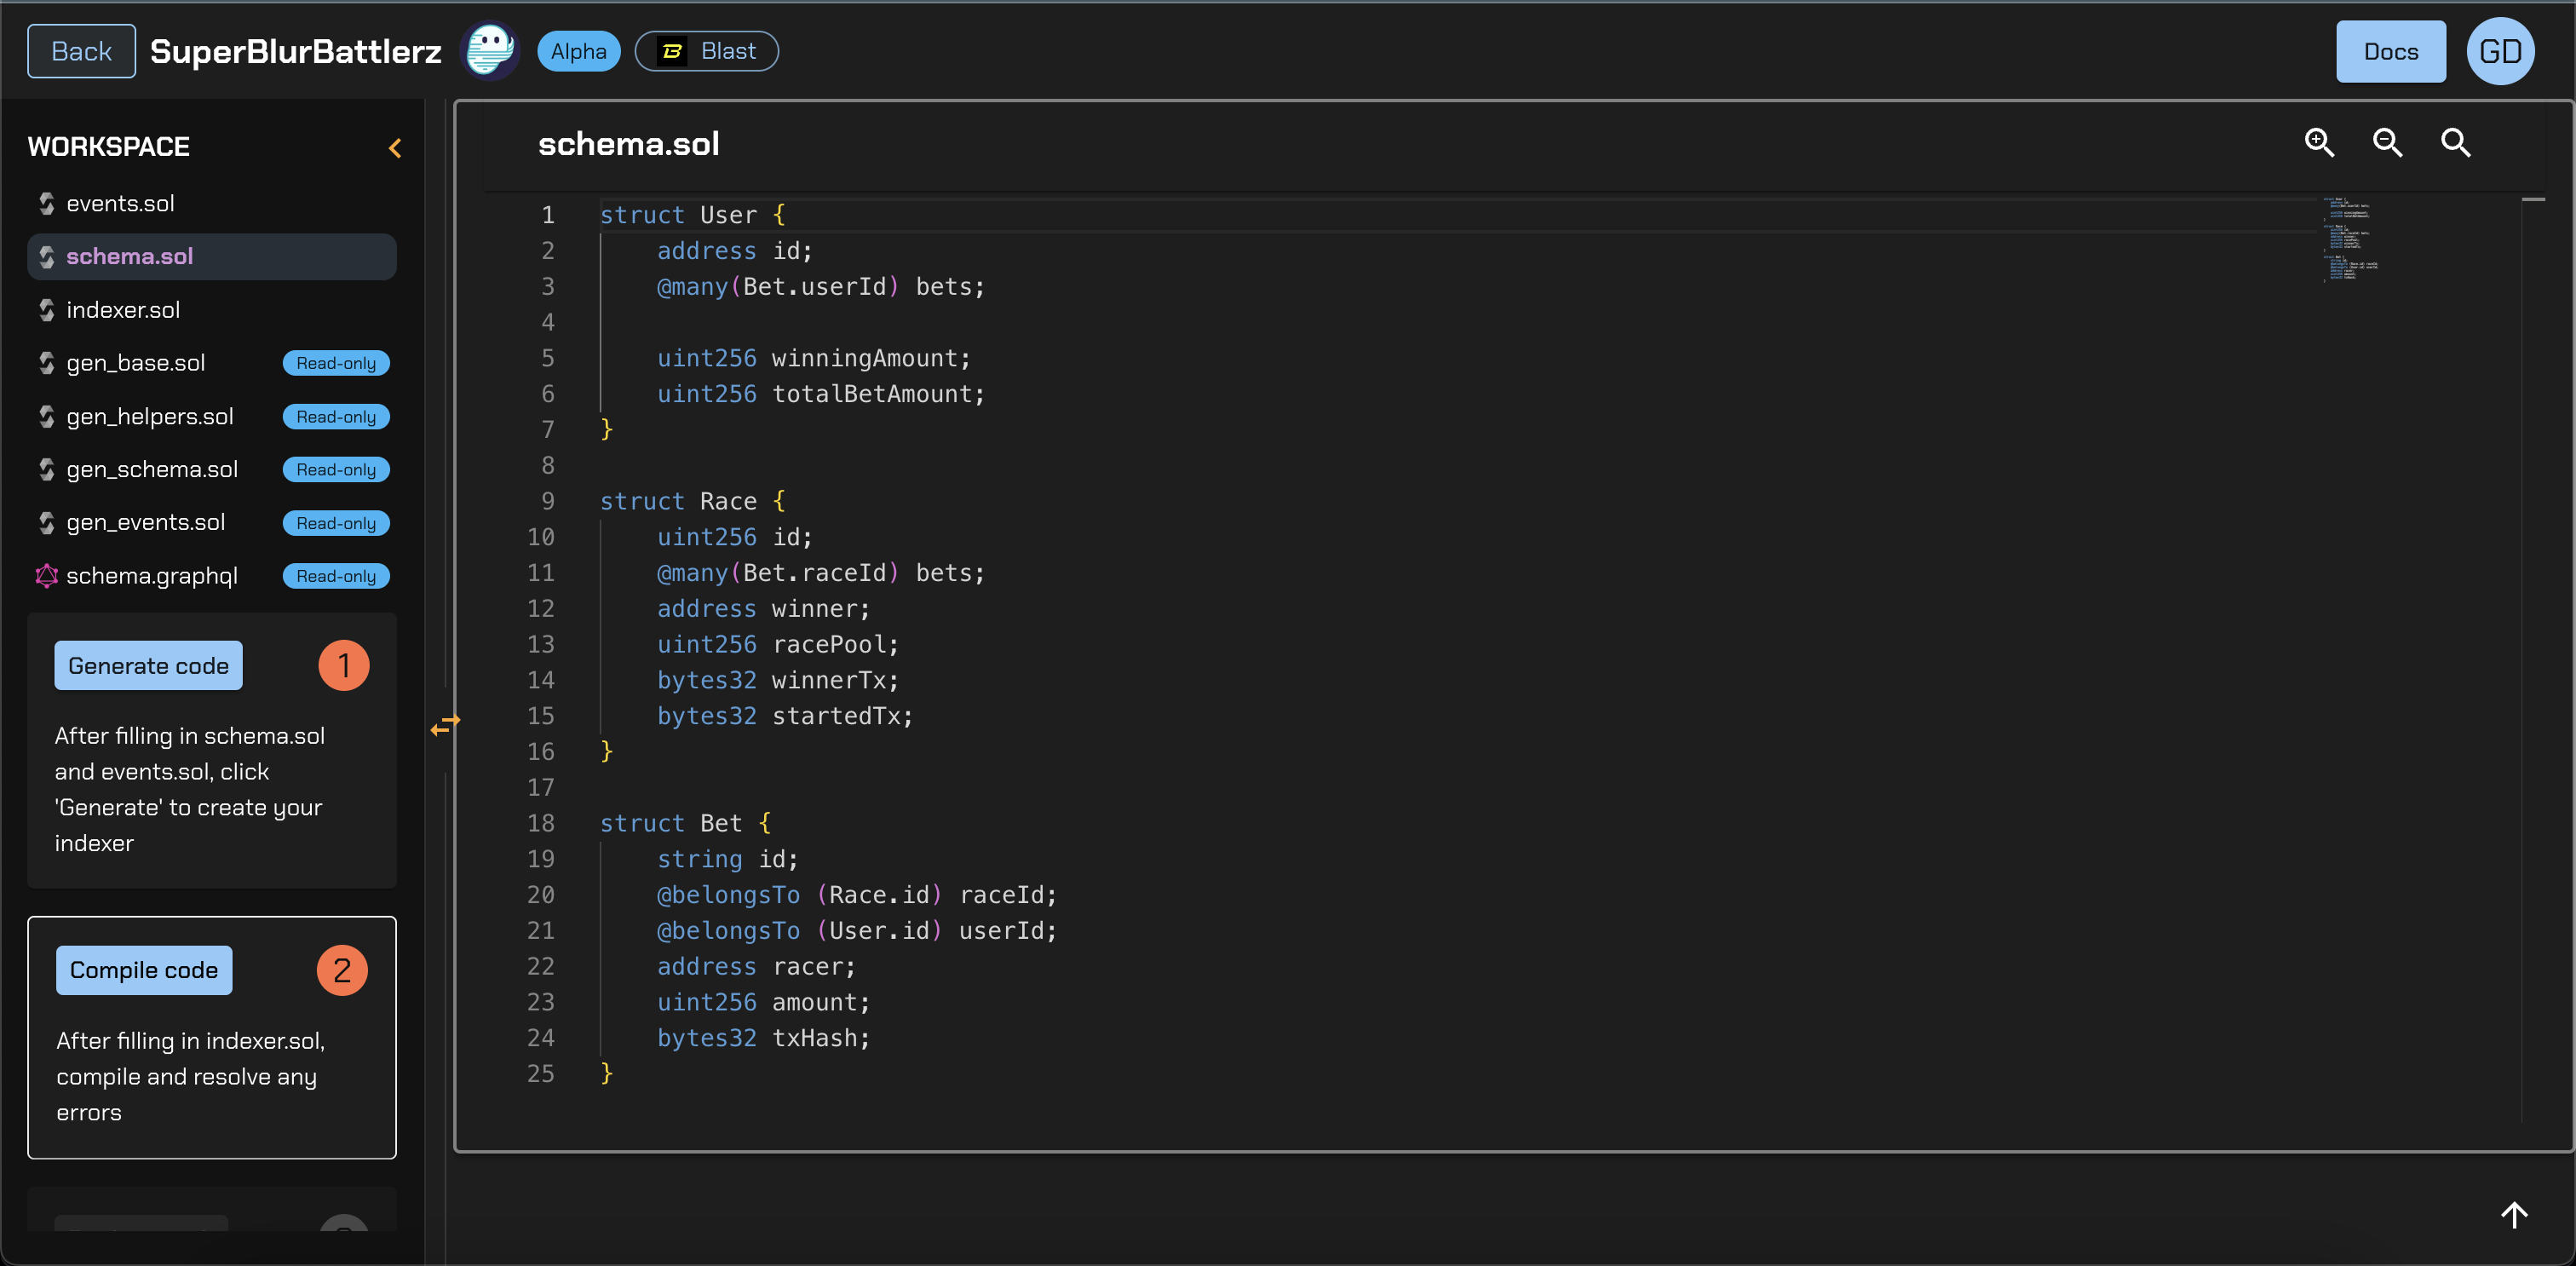
The schema file allows us to define entities as Solidity structs. Here, we have User, Race, and Bet entities.
Think of an entity as an object with many properties. Entities are the things that we'll create and keep updated
(we'll see how exactly in the next section). Entities are what we can query after deployment. So for example, by storing
users and their PnL we'll be able to use GraphQL to sort all users by descending PnL.
Indexer.sol
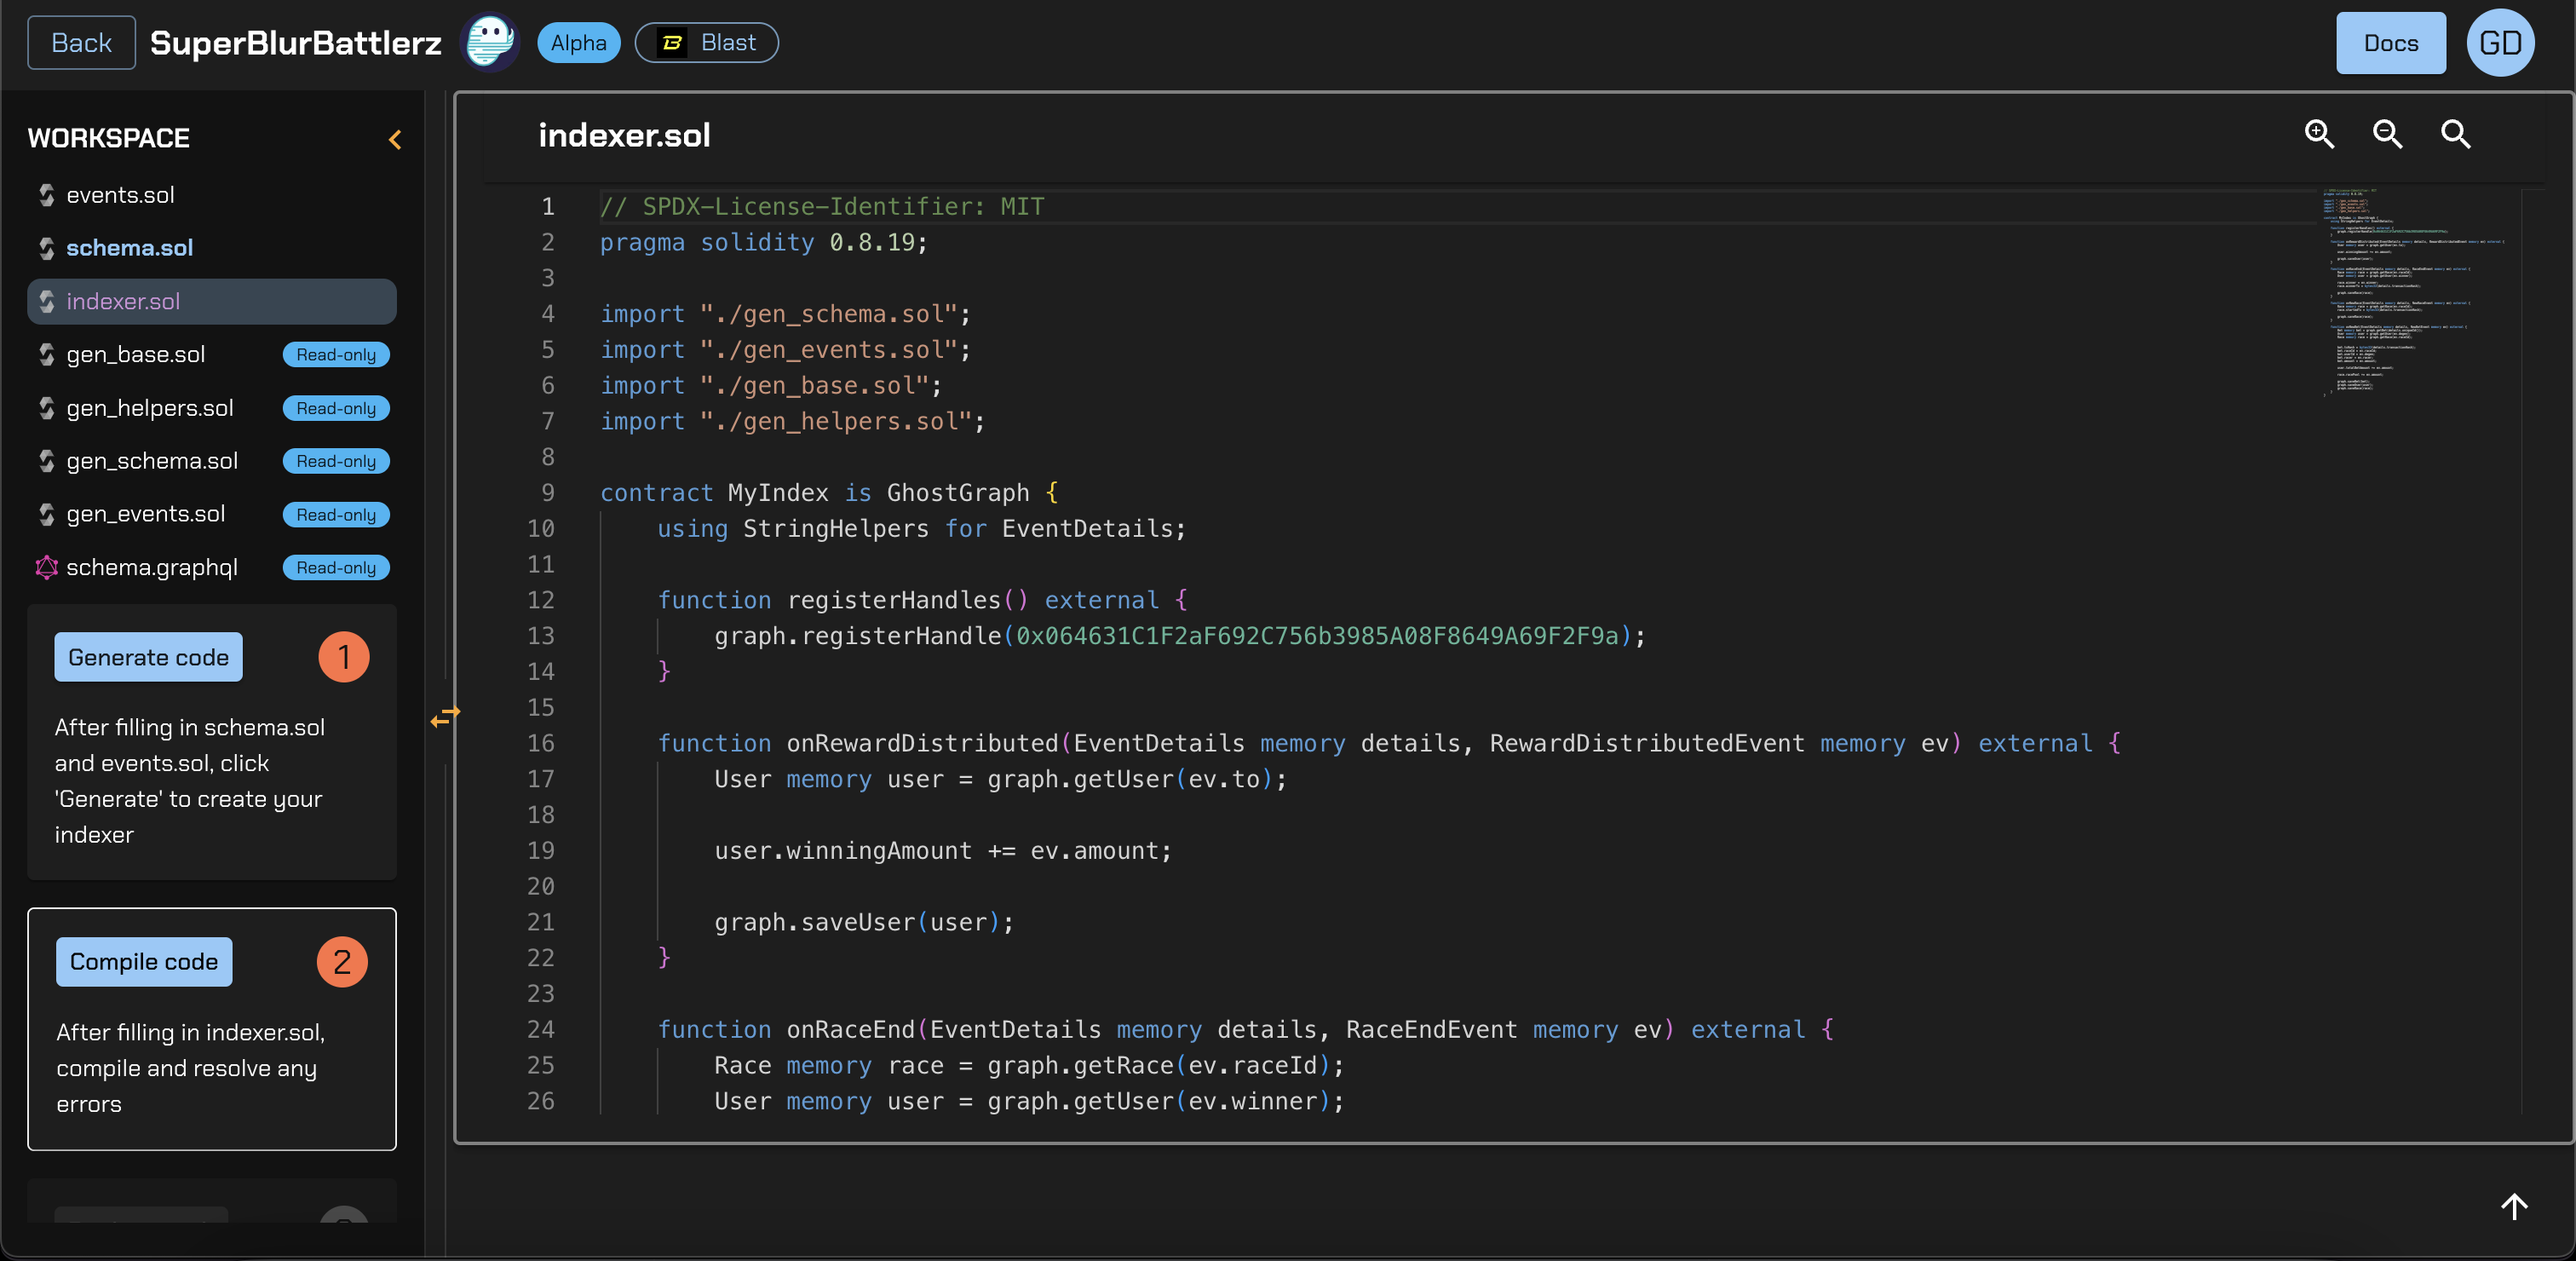
Once you've reviewed the events and schema, we can move on to indexer.sol where the core indexing logic will reside.
In this file, we register the contract addresses that we want to listen to events from. Take a look at the registerHandles function.
We also write transformations that are called for each different type of event (remember we defined events in events.sol).
Inside these functions we can get an entity, update it based on the values from the event and then save the entity.
Go ahead and review the transformations to understand them.
Compile and Deploy
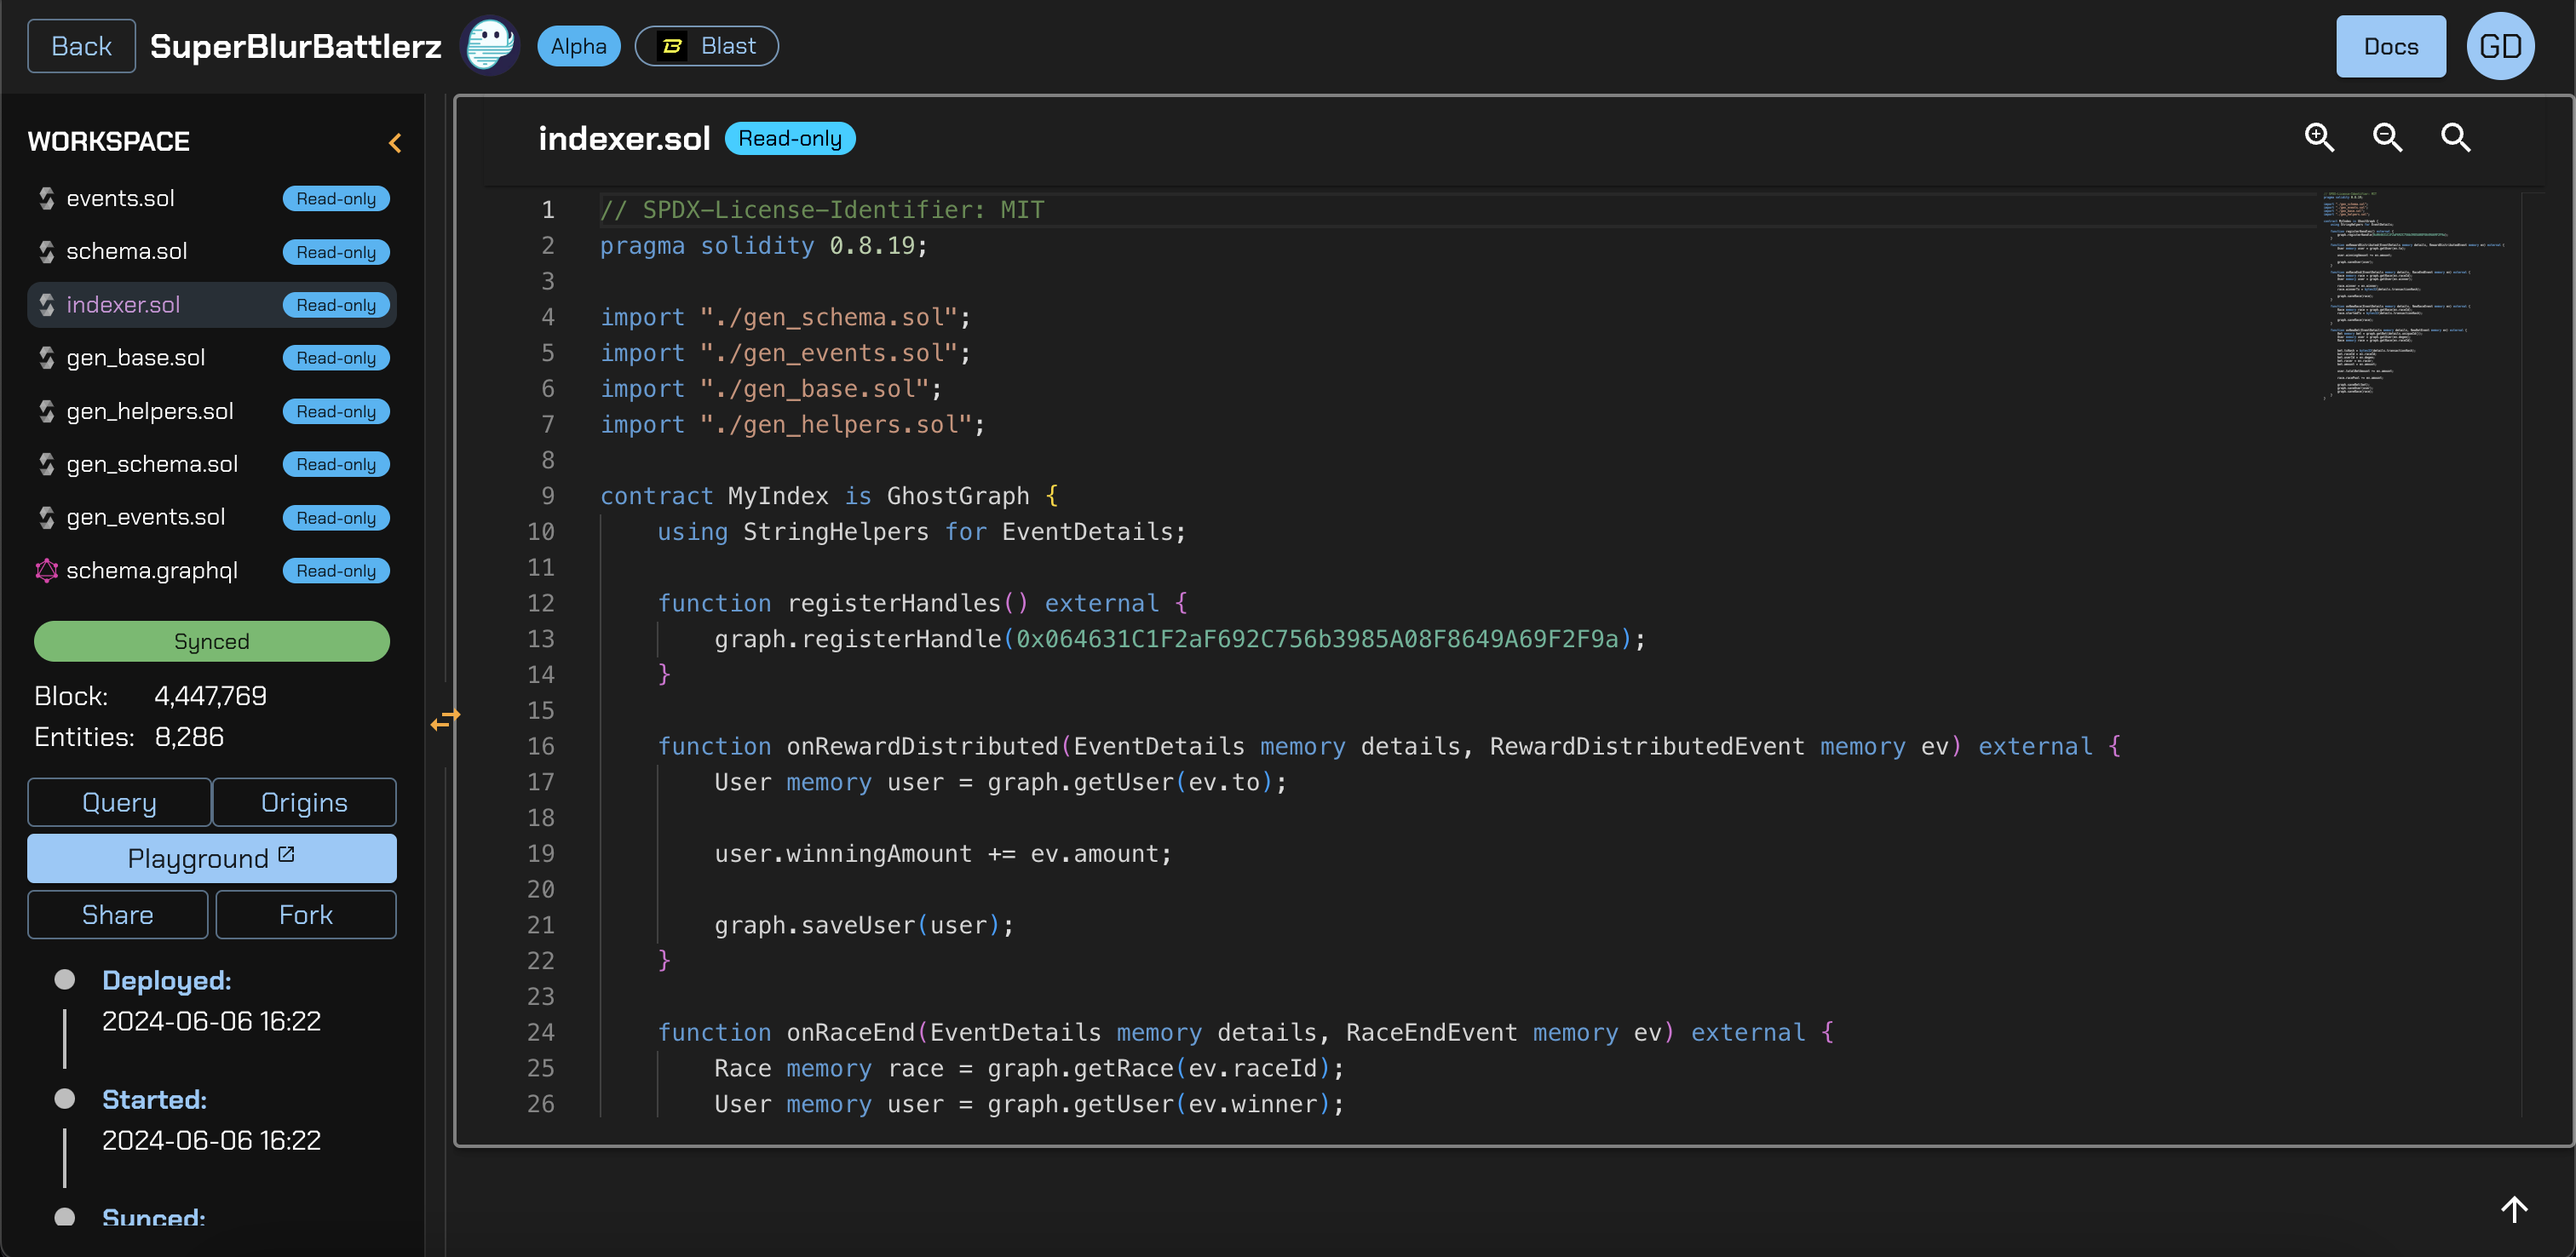
After reviewing every file, compile and deploy your GhostGraph. After a few seconds, your GhostGraph should be fully deployed and synchronized with the chain. You'll see how many entities are stored in your graph and have access to various buttons for further exploration.
Next, click on the playground button to launch your GraphQL playground.
GraphQL Playground
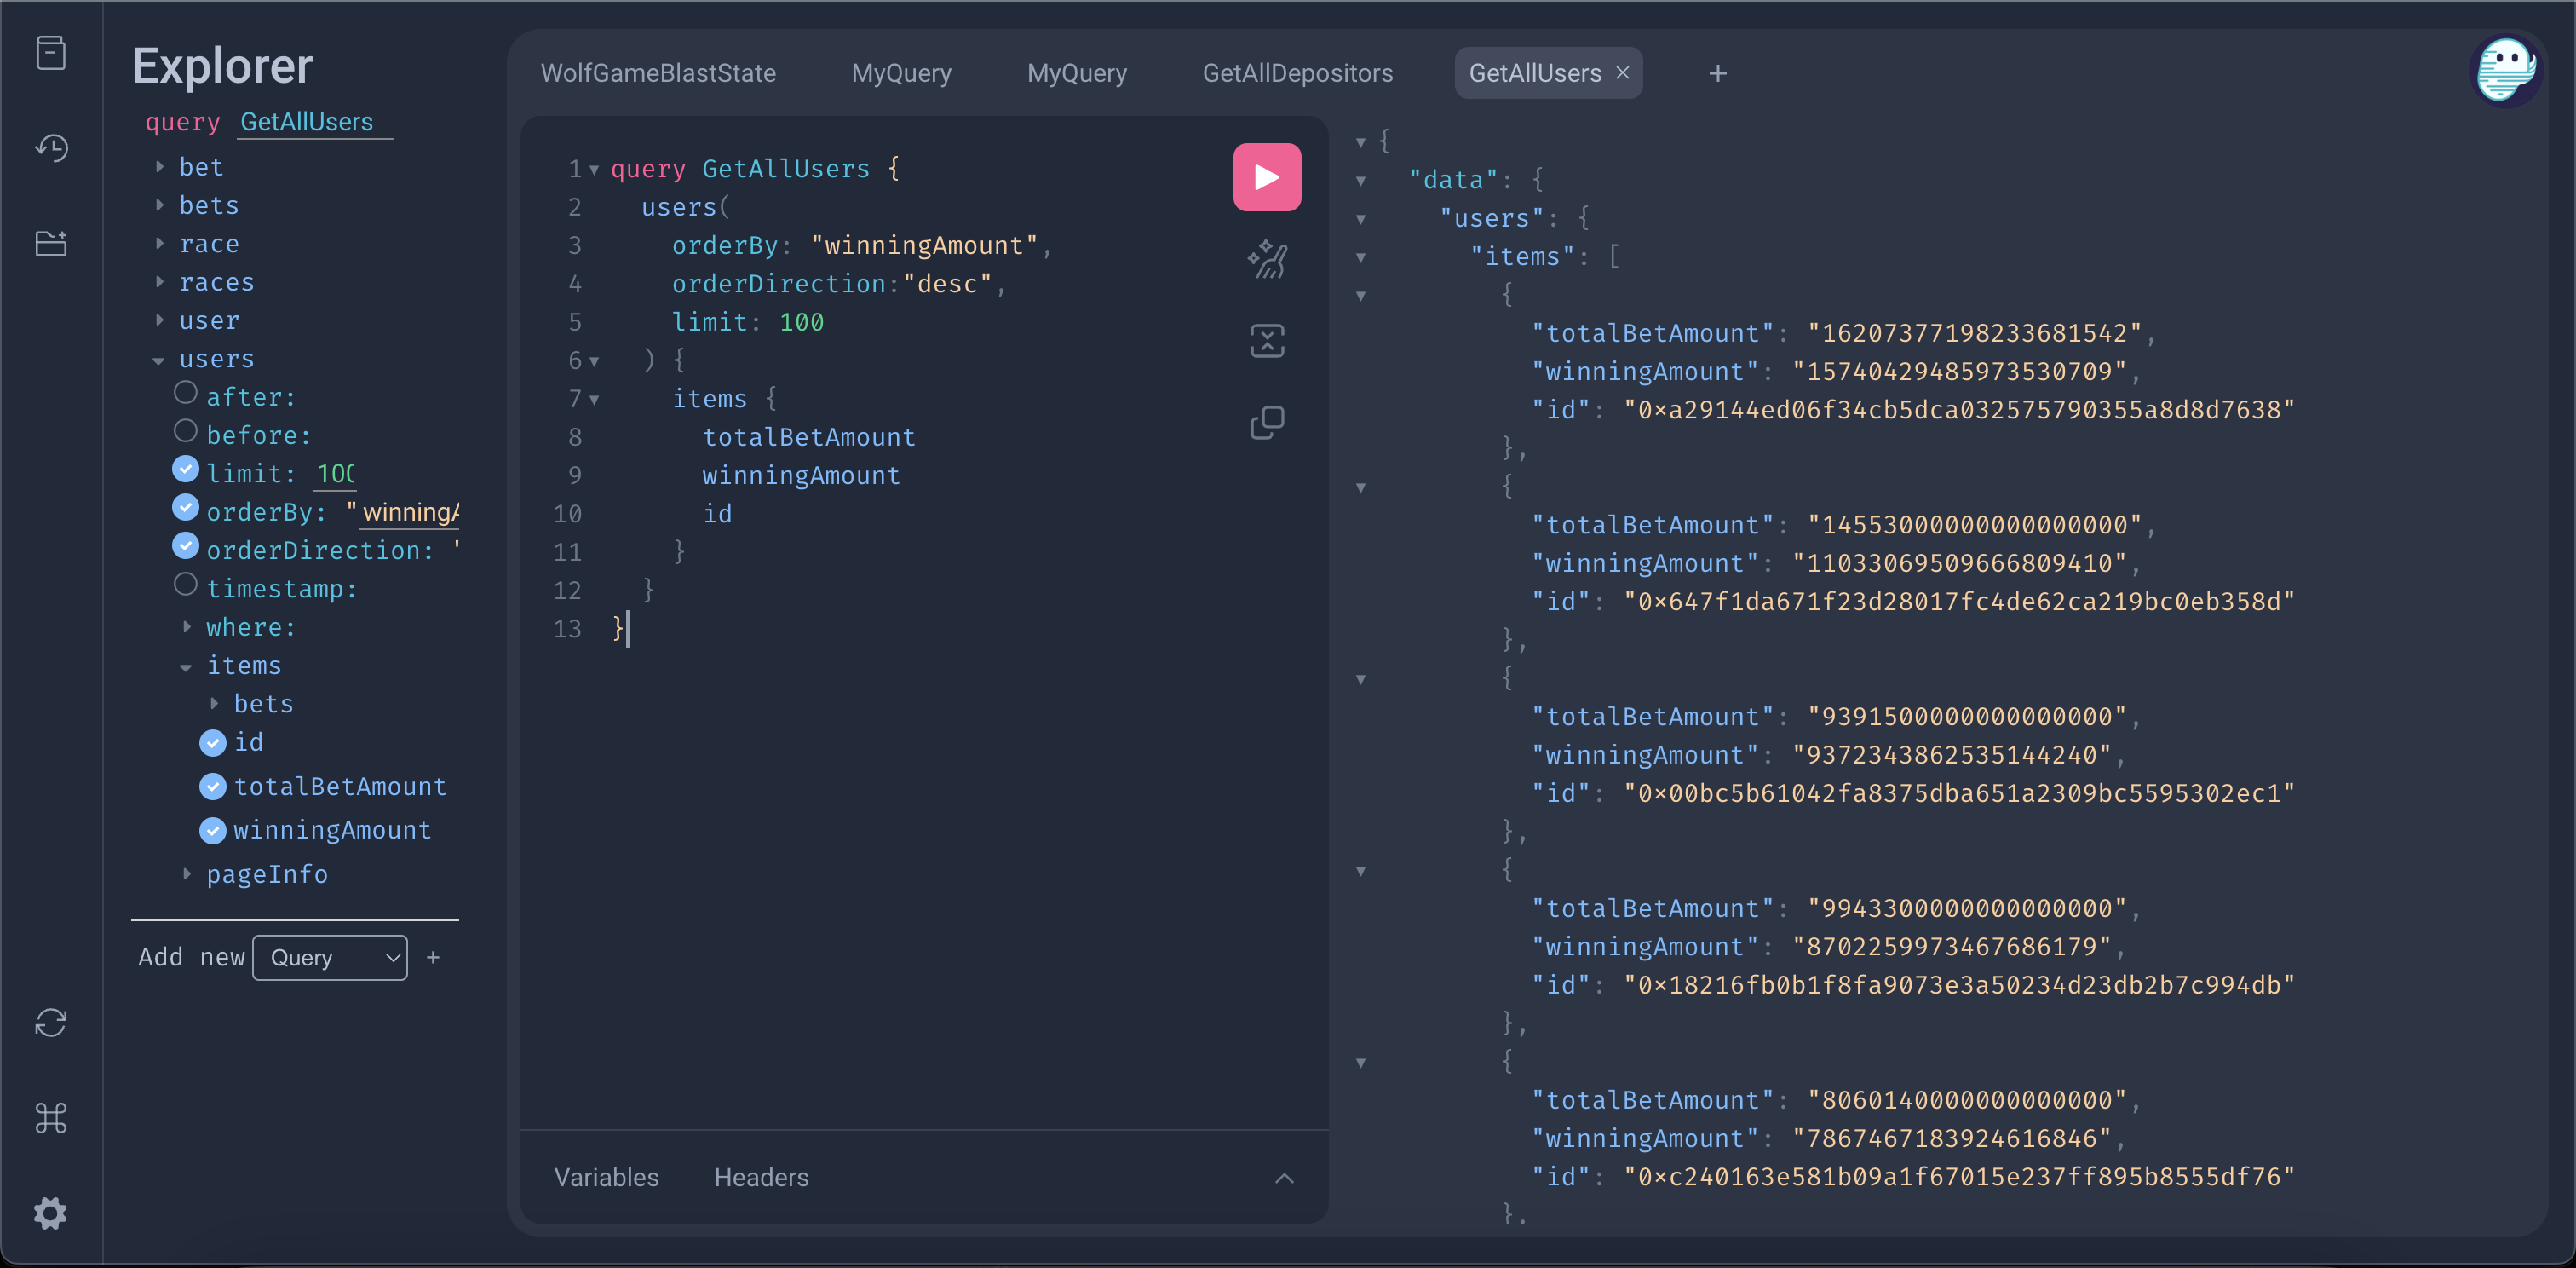
Copy and paste the query below into your playground and click on the big pink play button to query your graph.
If you'd like, explore more and change queries to query different entities stored in the graph.
query GetAllUsers {
  users(
    orderBy: "winningAmount",
    orderDirection:"desc",
    limit: 100
  ) {
    items {
      totalBetAmount
      winningAmount
      id
    }
  }
}
Now that we have our backend set up with our indexer/graph ready, let's hook it up with our frontend.
Frontend Setup
- Download the frontend repo on GitHub
- Open the command line and run
git clone https://github.com/chrischang/gg-graphql-template.git - Follow the
README.mdto install the dependencies and clone the environment
Environment Variables
There are two environmental variables that you need:
REACT_APP_GHOST_GRAPH_URLREACT_APP_GHOST_GRAPH_KEY
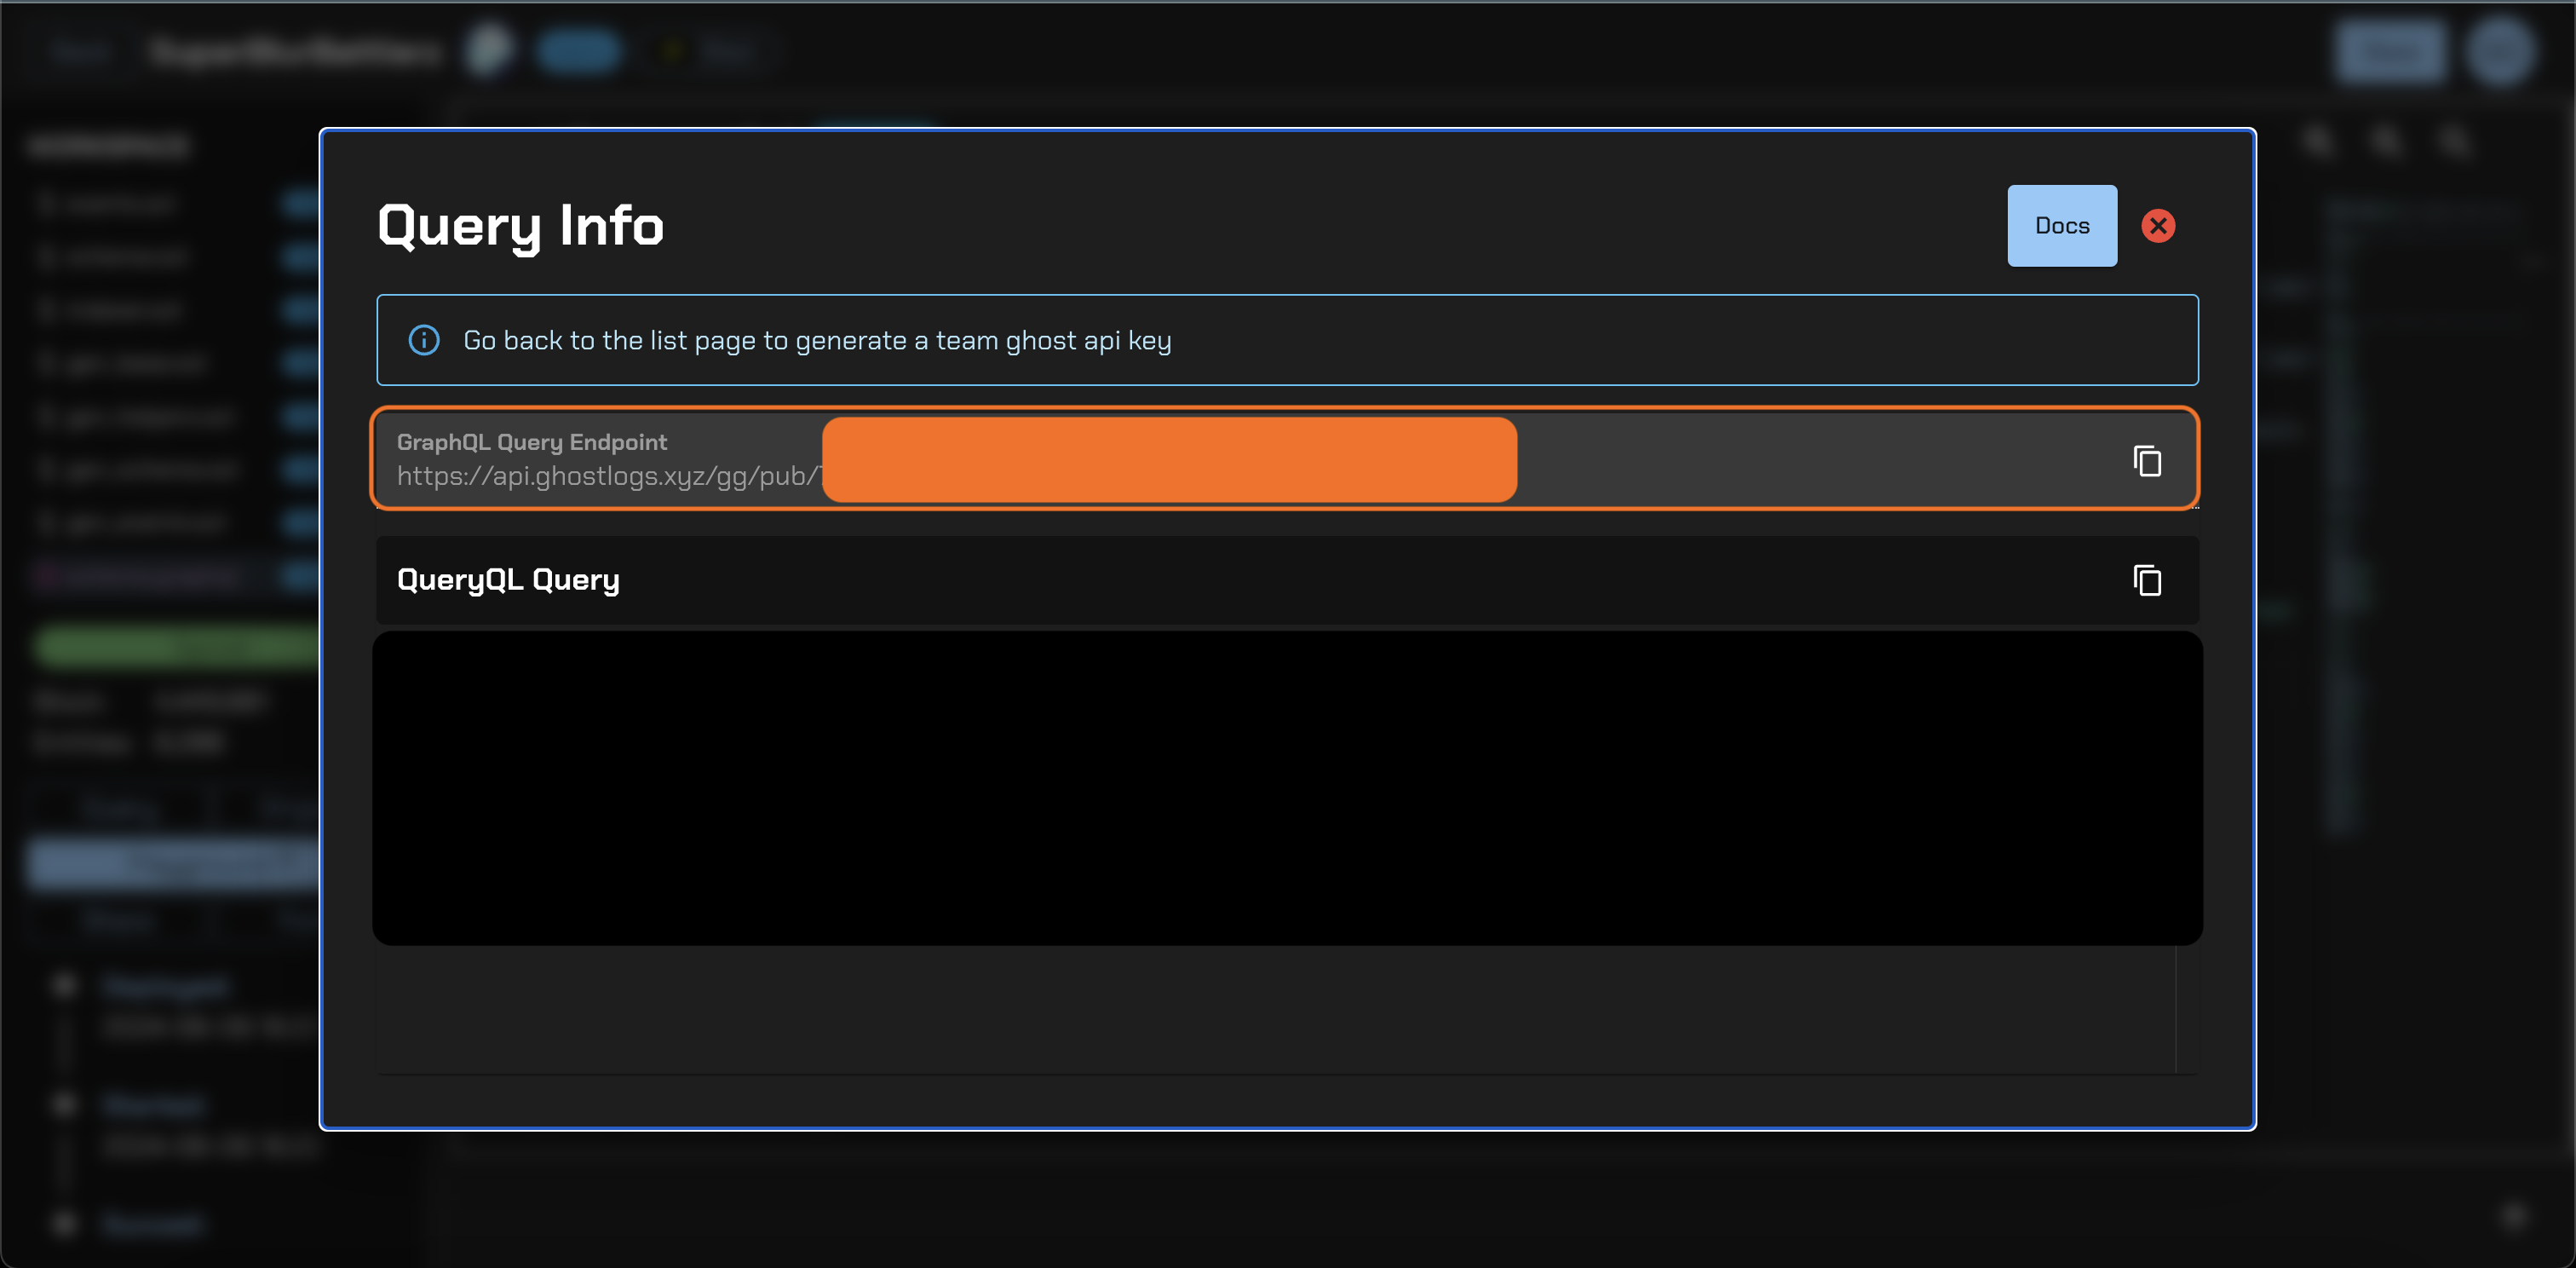
REACT_APP_GHOST_GRAPH_URL
In the code editor, after the indexer has been deployed and synced, click on the Query button to get your query URL.
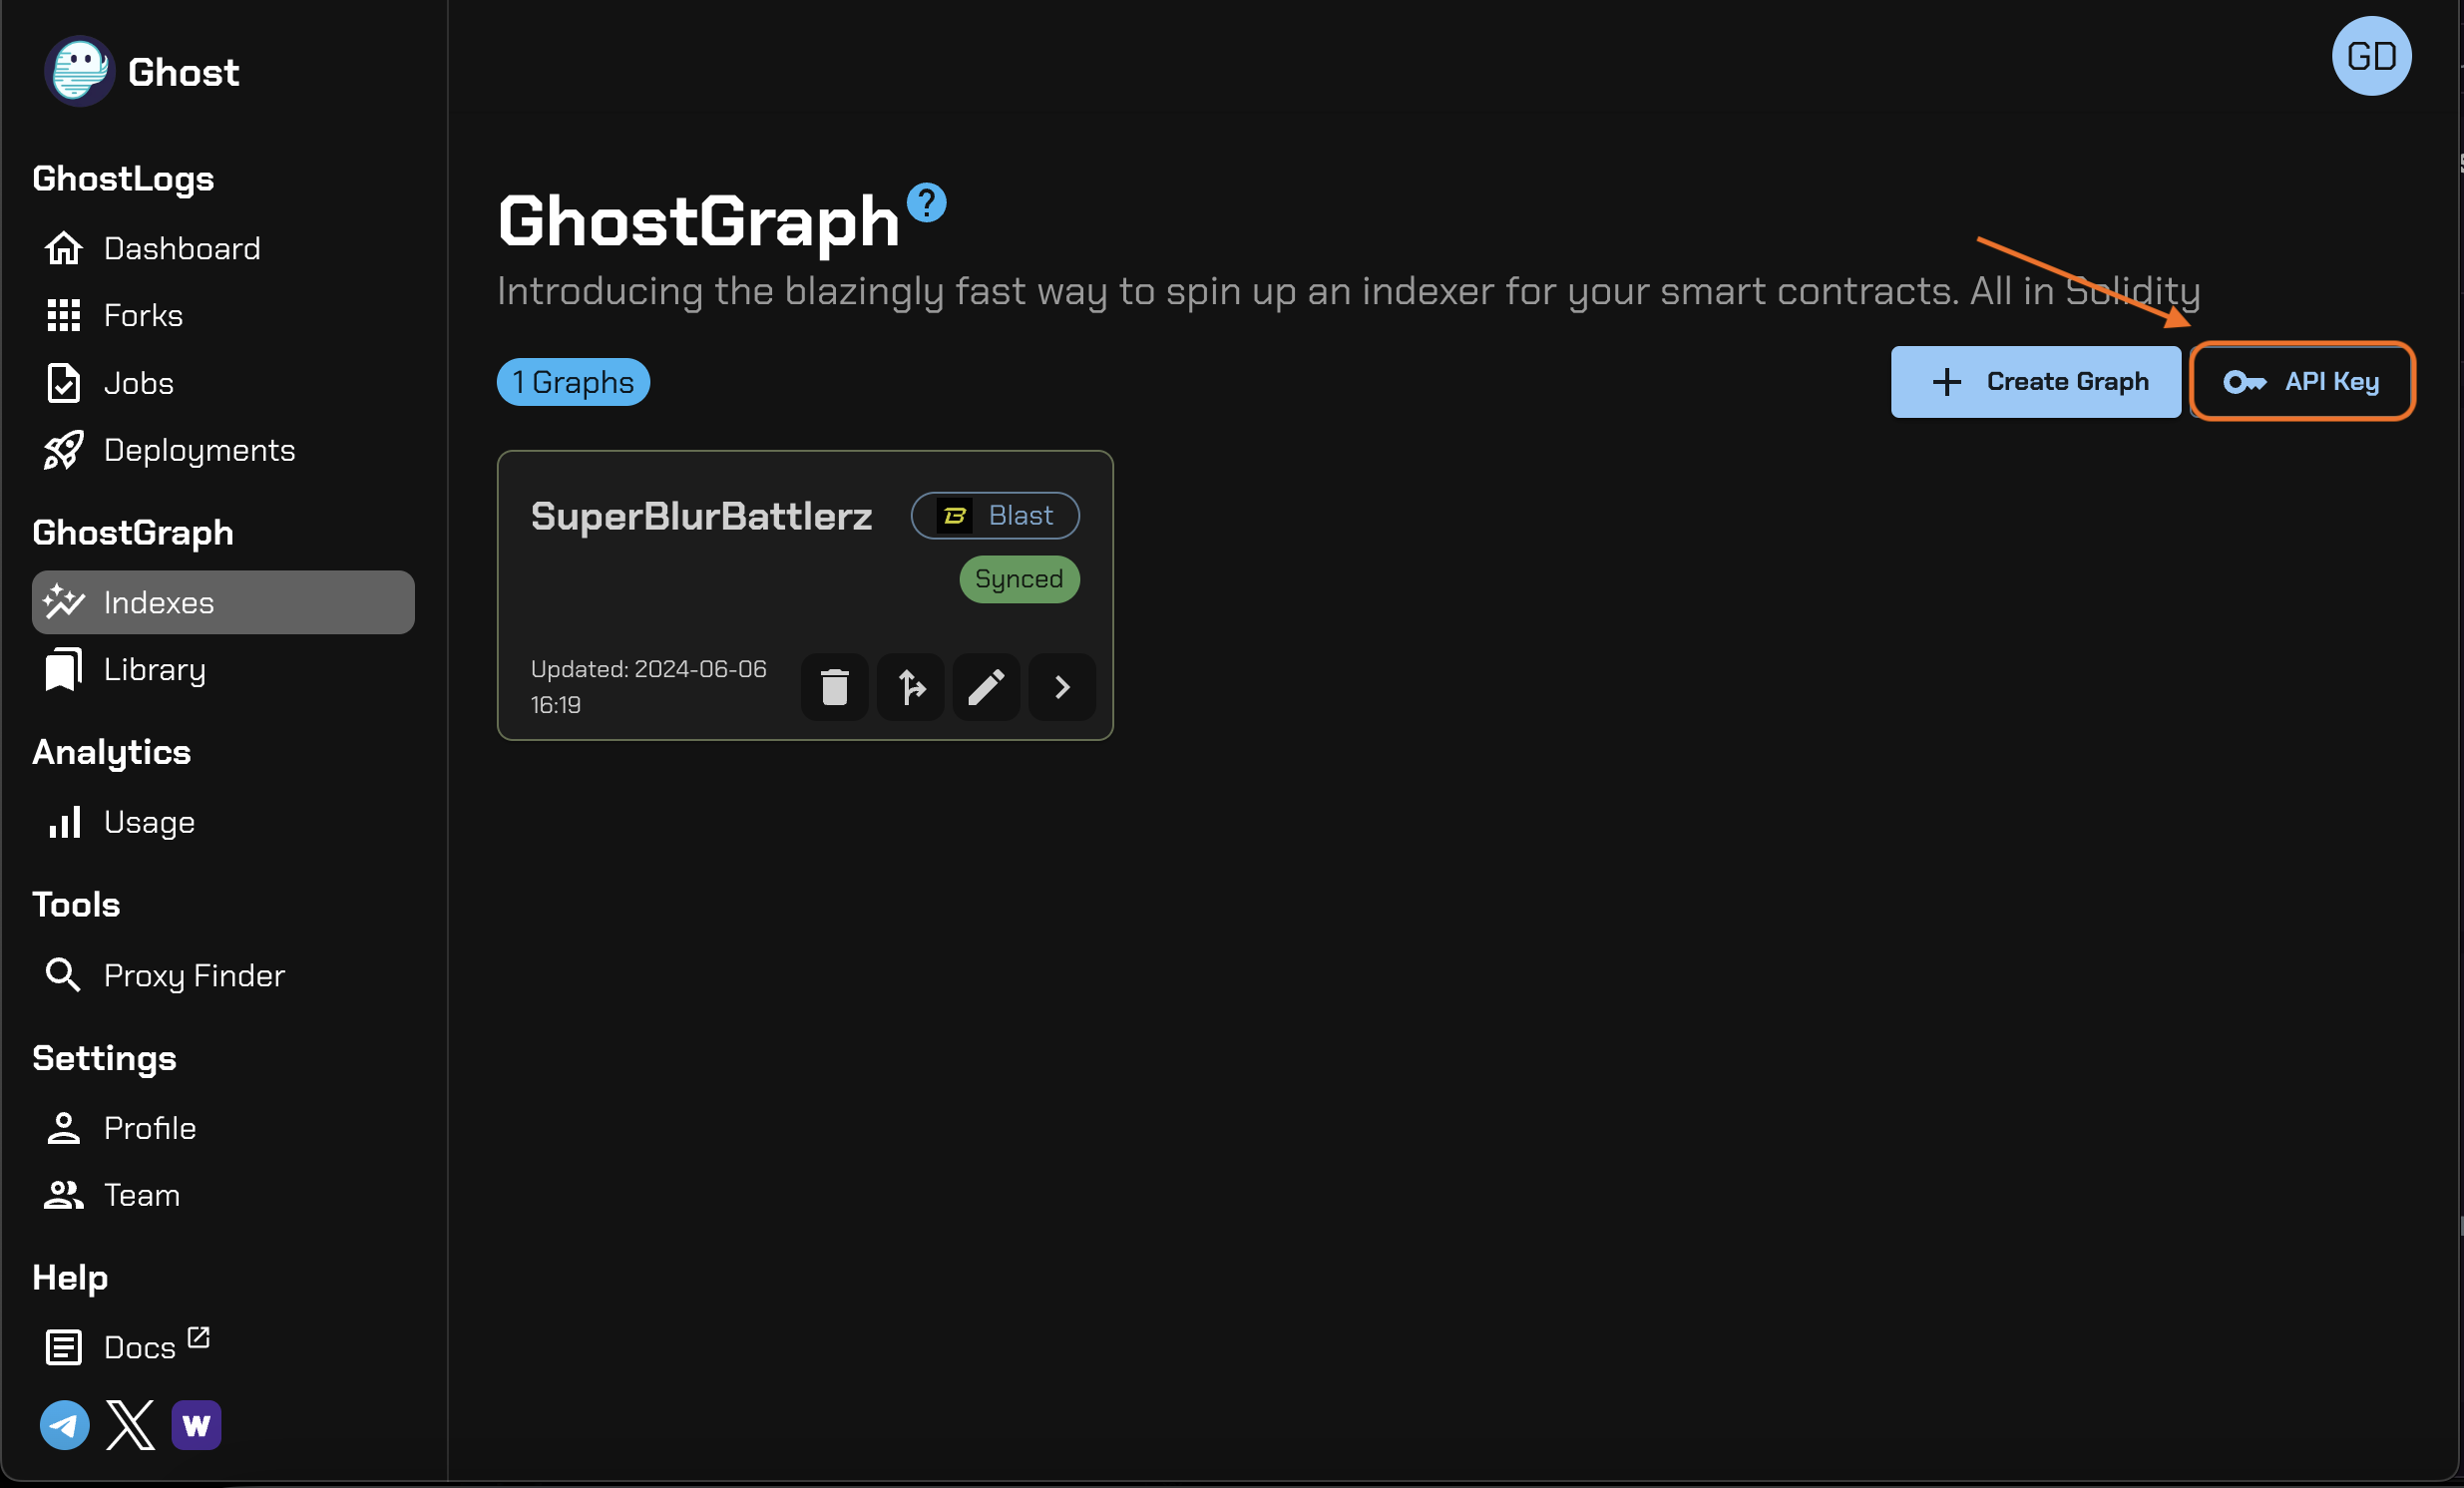
REACT_APP_GHOST_GRAPH_KEY
Generate your key on the main GhostGraph dashboard.
All Together
Your .env file should look like this:
REACT_APP_GHOST_GRAPH_URL=`https://api.ghostlogs.xyz/gg/pub/<queryUrl>/ghostgraph`
REACT_APP_GHOST_GRAPH_KEY=`<apiKey>`
(Optional) If You Made Modifications to Your GhostGraph, Follow These Steps
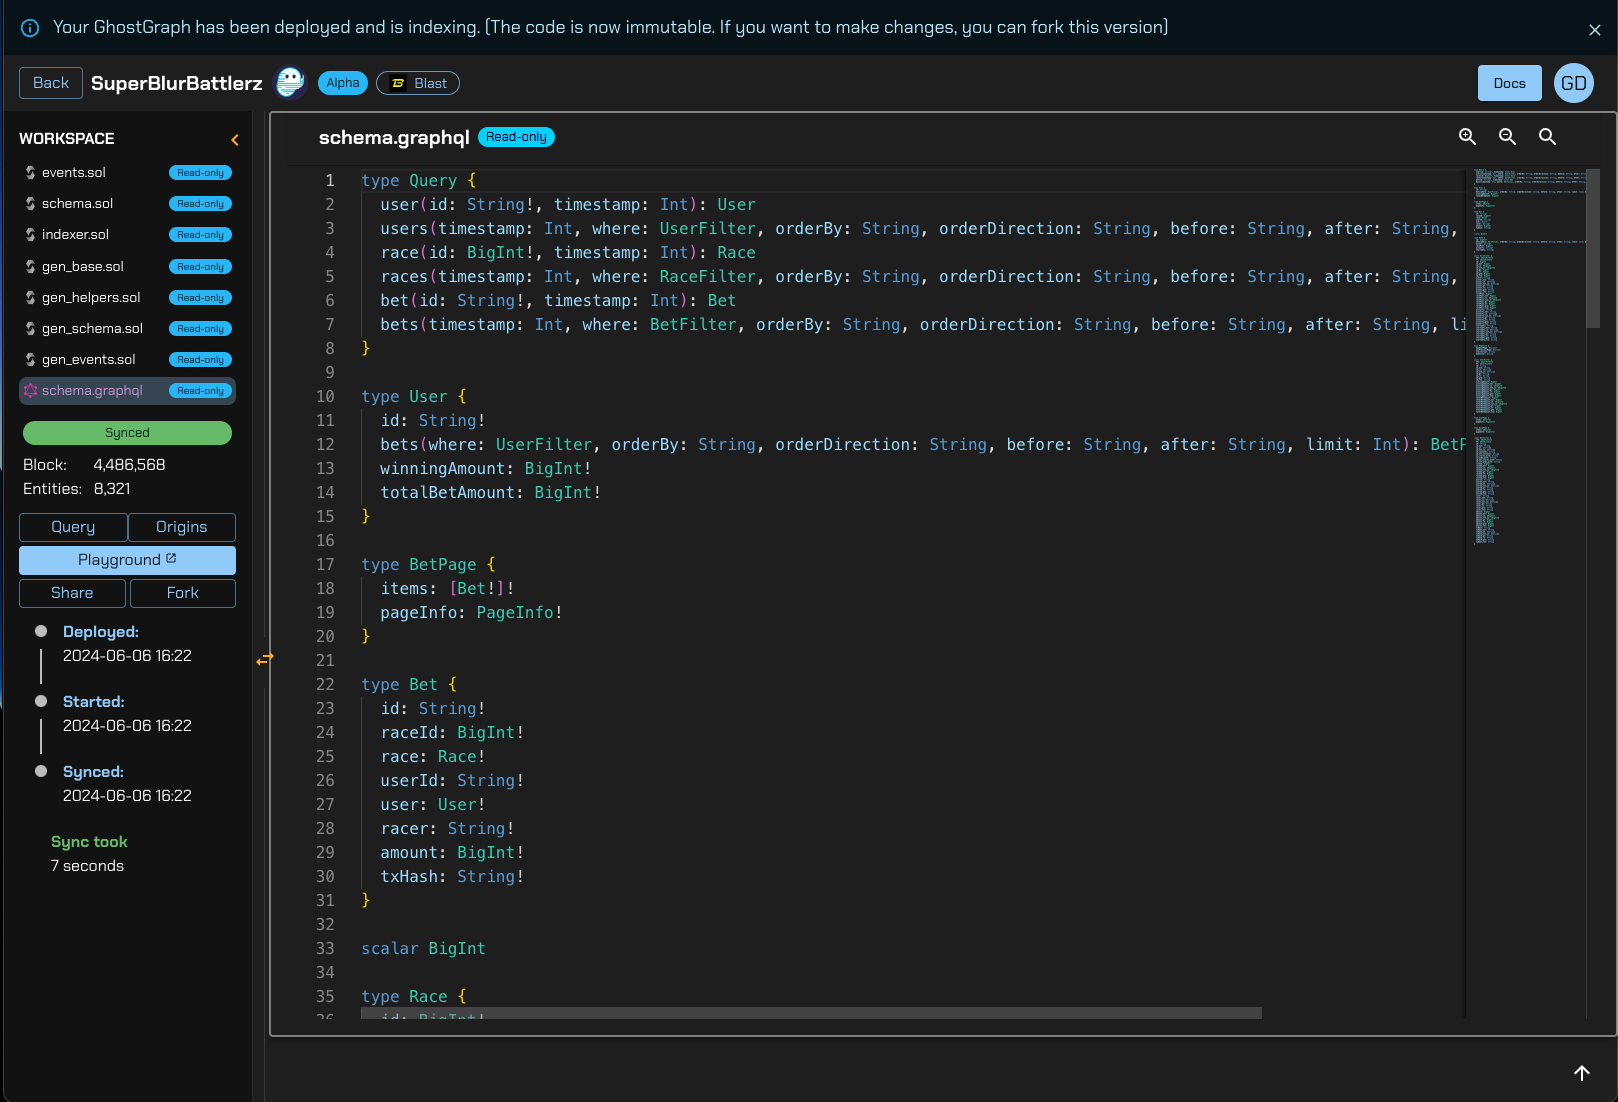
Copy schema.graphql
In the GhostGraph code editor, find the schema.graphql file. Copy the entire file and replace the content of the schema.graphql file in your frontend repository.
Regenerate queries.tsx
Generate the queries.tsx file by running npm run codegen. This will generate a queries.tsx file in the graphql/generated folder, which includes:
- Typings
- React hooks
You can use these to build your frontend.
Let's run the app
Run PORT=3001 npm run start in the command line of the frontend repo. This should automatically open a browser tab and navigate to http://localhost:3001. If not, manually open a tab and navigate there.
Voila
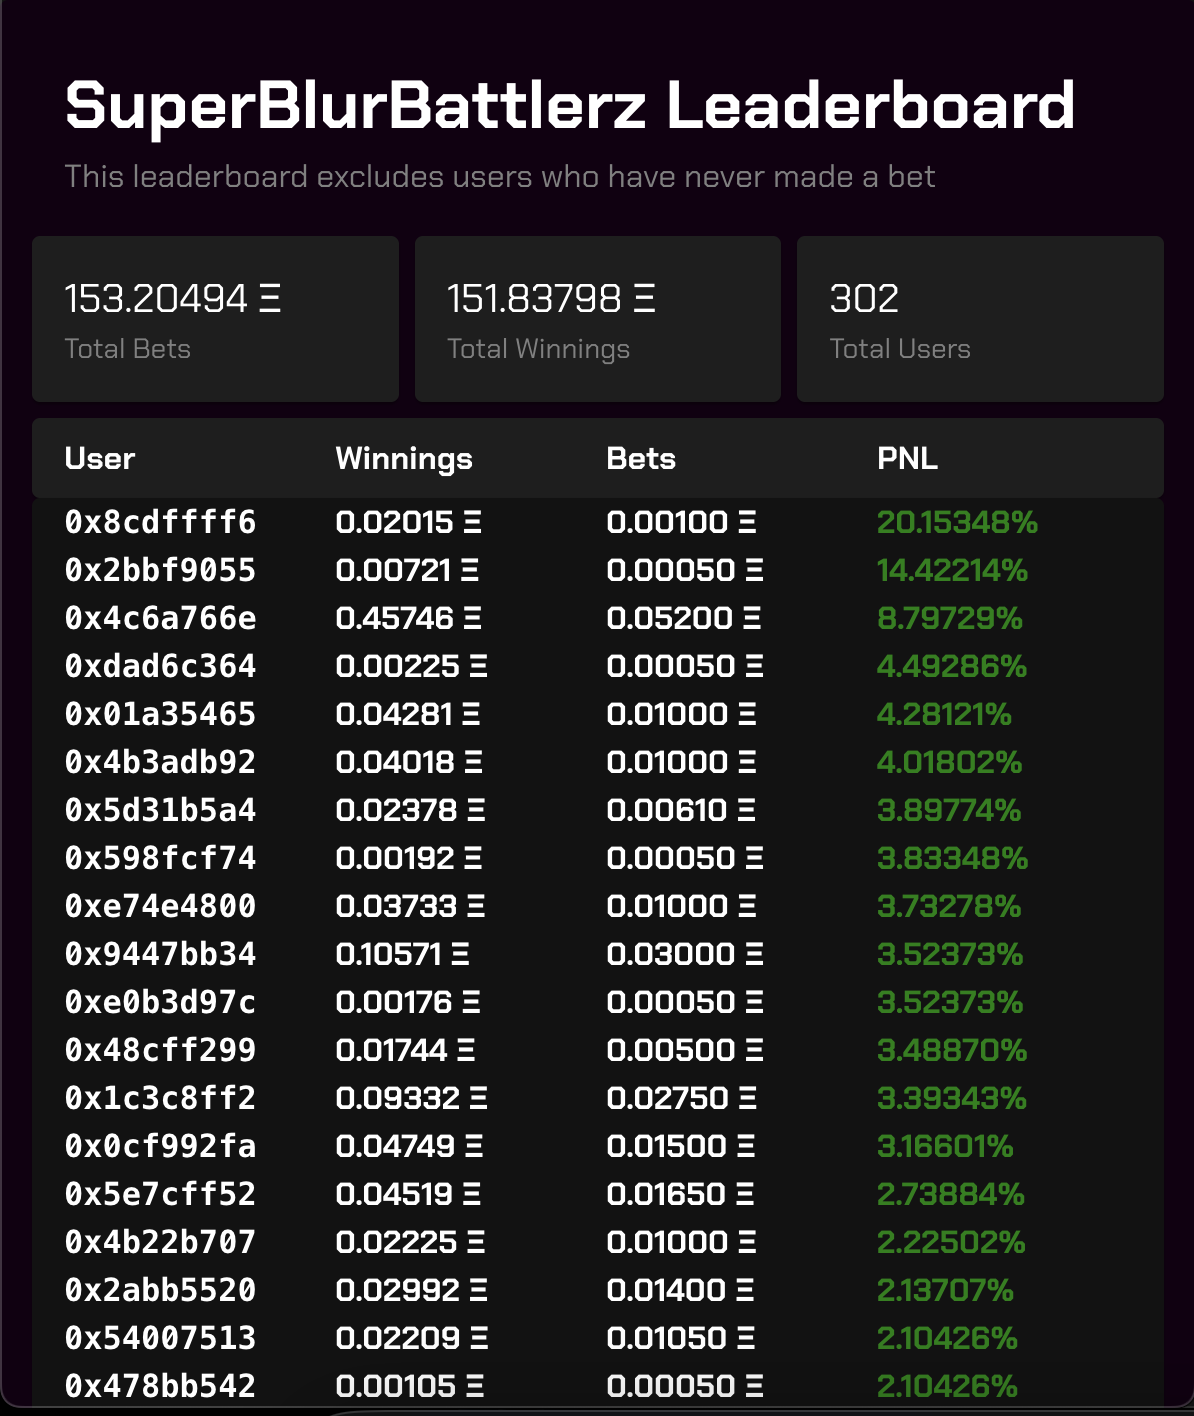
Congratulations! You've successfully created an application connecting GhostGraph to your frontend, showcasing the PNL Leaderboard.
Closing Comments
What other features or improvements would you like to see on this leaderboard?